FIVE FABULOUS SCRAPBOOK BORDER IDEAS TO ENHANCE YOUR PAGE
A scrapbook border can really add that "wow" factor to your layout. In fact, your scrapbook border can even work as one of the feature elements on your page to compliment both your photograph and the other embellishments.
However, not much attention is give n to scrapbook border ideas and it can be hard to find inspiration to make that transition from plain cardstock strip borders to something a bit more fabulous.
To help you along with your borders, here are five scrapbook borders that will instantly enhance your scrapbook ideas design.
#1 - LAYER DIFFERENT COLORED STRIPS OF PAPER AND WASHI TAPE
Add dimension to your borders by layering different colored materials!
This is probably one of the easiest and quickest ways to really level up your scrapbook border. As a bonus, it's also a great way to use up your pretty colored card and paper scraps.
Rummage through your scrap paper pile to find some suitable pieces of cardstock and paper that can be cut the length of your scrapbooking page.
Likewise, find a washi tape that will go with the colors you have chosen. A mix of plain and patterned pieces is ideal as it can sometimes look a little too busy if you select only patterned paper and washi tape.
Next, cut the paper or cardstock into various widths the length of your scrapbooking page and experiment on the page before gluing them down. Of course, don't forget your washi tape strip!
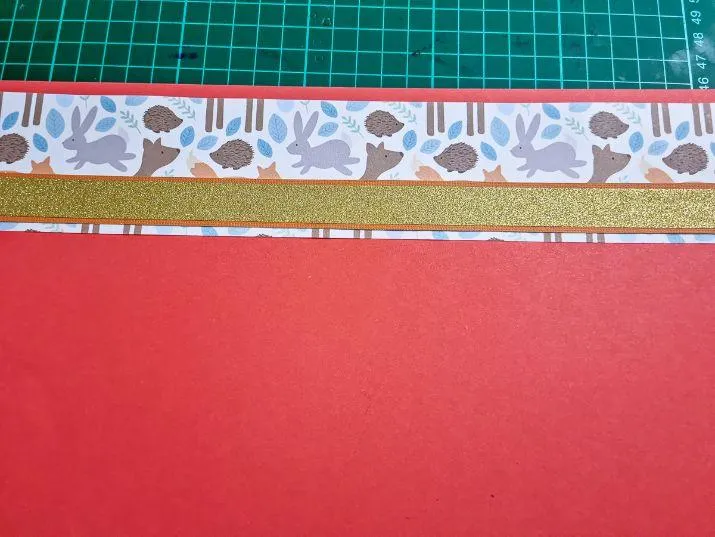
You can see in the example above that I have only used three different pieces. I started with a thick strip of cute woodland creature-themed paper and topped this with a thinner strip of plain orange.
This orange color ties in with the orange on the woodland-themed paper and the reddish-colored cardstock base.
Finally, I finished it off with a glittery gold strip of washi tape on top of the orange strip.
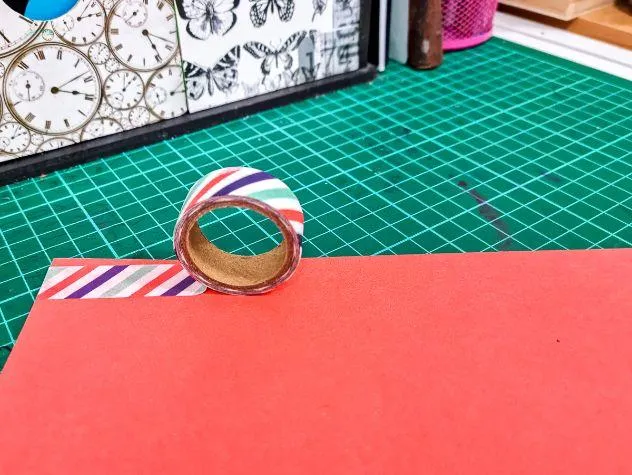
#2 - CREATE A RUFFLE BORDER WITH WASHI TAPE
A unique border design using simple washi tape folding technique!
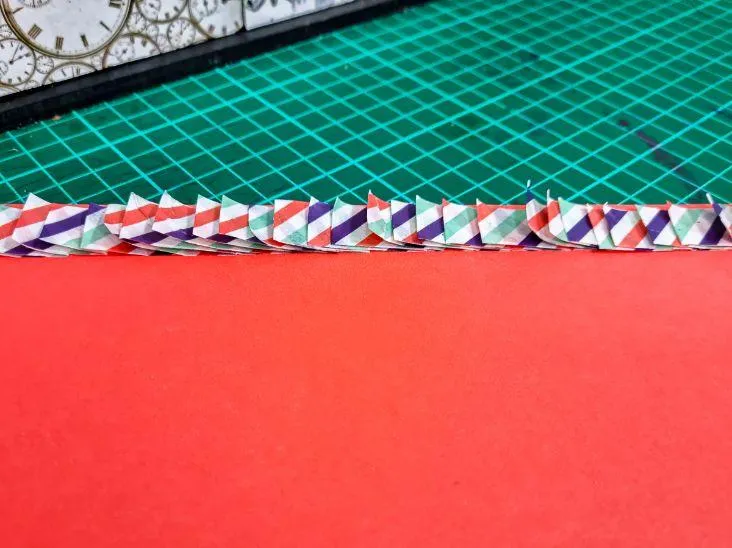
This unique ''ruffle'' border is created with washi tape. It can be displayed flat by running your hand over the ruffles to squish them down, or it can be displayed with a bit of ''pop'' by ruffling them up the wrong way and making them stick out a little.
It's a little hard to explain how to create this so I've included some pictures below so that you can follow along step by step.
Begin at the edge of your spread and stick down around 1 inch of your washi tape as per the photograph below.
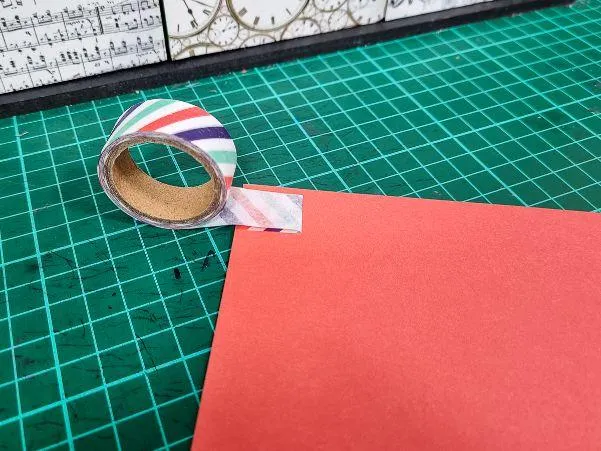
Next, fold it back on itself so that the two printed sides are now touching in the middle.
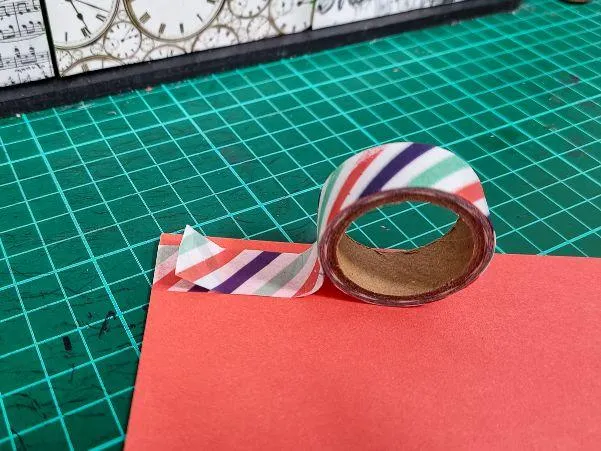
Now, fold it back the other way, making sure the fold is a pinky finger width away from the edge of the cardstock base like in the photograph below.
Keep repeating this process, each time making the fold a little further along. It will begin to look like the photograph below.
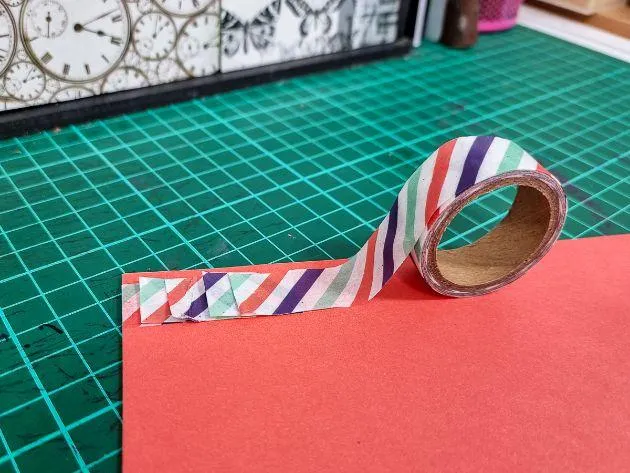
Just keep repeating this process until you have created a ruffle the full length of your scrapbooking page edge. This scrapbook border uses a lot of washi tape so it's good to use some of your less expensive tapes for this idea.
#3 - USE HALF CIRCLES TO CREATE YOUR SCRAPBOOK BORDER
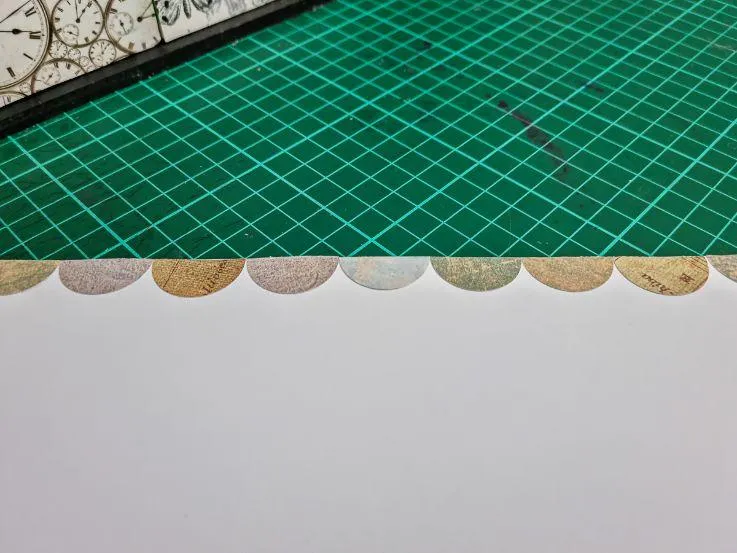
Get creative with your border design by using scrap papers and a circle craft punch
This scrapbook border idea is super simple and is great for using up your smaller scrap pieces. Start by cutting a whole heap of circles out of your scrap paper with a circle punch.
Next, grab your scissors and snip each of them in half. It's easy enough to just eyeball the halfway point.
Now that you have a nice little pile of colored half-circles, go ahead and glue them onto your scrapbooking page to make a simple scrapbook border.

#4 - RAID YOUR FABRIC STASH
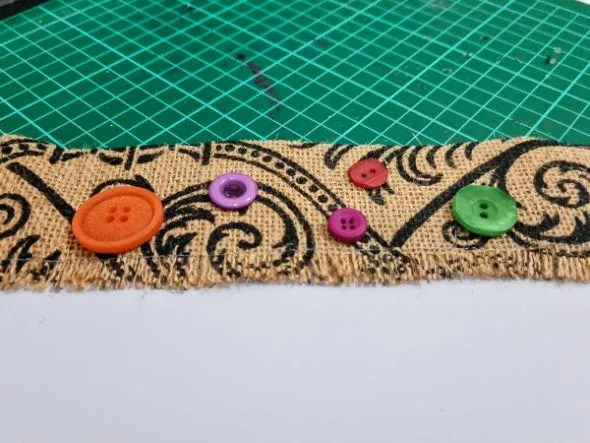
Go through your sewing kit and use your fabric scraps and other supplies for your border
When it comes to scrapbook borders, you don't always have to use paper and cardstock. Using fabric and other non-paper products is a great way to add interest to your scrapbooking layouts.
In particular, fabric with a bit of texture really adds that "extra wow factor" to your scrapbook border. Jute, felt, lace, rick rack and anything vintage can find its place on your scrapbooking page!
In the example above, I have used a scrap piece of patterned jute fabric as a bold border on my scrapbooking layout.
Buttons were placed on top to add interest and I also plan to add some small circle cutouts within the center of the scrapbooking layout to tie the elements together.
#5 - INVEST IN SOME DECORATIVE EDGE CRAFT PUNCHES
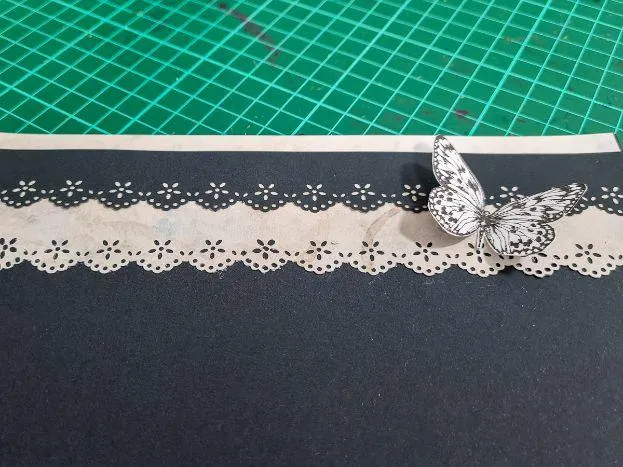
Using craft punches that are designed to create a decorative edge finish is an easy way to create a cute scrapbook border with minimal supplies.
Once again, you can use cardstock or paper scraps for this scrapbook border idea, providing it's long enough to run the length of one side of your scrapbooking spread.
In the example above, I have started with a black cardstock scrapbooking page as my base and using a lightly patterned cream scrap of thick paper, used a paper punch with a lace edge finish to add a contrasting border.
Next, I added further contrast by using the same lace edge border punch on another piece of black card to create a much narrower strip.
This narrower strip was glued on top of the existing cream patterned strip. I just love how the color underneath can be seen through the lace border pattern!
To finish this border off, I stamped a black butterfly onto white paper and cut it out. Before I glued it down, I folded its wings out a little to give the feeling of movement, running the glue on the butterfly's body only.
I know once this page is in a scrapbooking album it will need to sit flat but for now, I can admire it in flight.
DO YOU HAVE ANY GREAT SCRAPBOOK BORDER IDEAS?
I hope that you have found some inspiration with these five great scrapbooking borders. Do you have any border ideas that are too good not to share? Have you been inspired to use one of these borders in your own scrapbooking layouts? We would love to see your borders!
Happy scrapping!
OUR BEST SELLING BOOKS


HERE'S SOME OTHER SCRAPBOOKING ARTICLES THAT YOU MAY FIND HELPFUL
The Top 5 Scrapbooking Tools That Are Proven To Help You Create Better Layouts
12×12 Scrapbook Layouts Tips You Should Never Miss!
5 Tips To Creating Catchy Scrapbook Titles For Your Layouts
TOP 5 Scrapbooking Ideas I LOVE!
How to Scrapbook: The Ultimate 'Learning How to Scrapbook for Beginners'
Scrapbooking Tips: 10 Tips To Help You Create Even More Enchanting Pages!
5 Simple Scrapbook Organization Ideas and Tips!
Scrapbook Stores Online: Shop from the Top 7 Best Craft Stores
Contact Us | Login | Store | About | Reviews | Privacy Policy | Terms & Conditions | Returns
Copyright © 2025 by ScrapbookingCoach.com
We accept payment with:
