
Super Easy Old Fashioned Scrapbook Layout For Old Photos
An amazing vintage scrapbook layout made by using simple techniques!
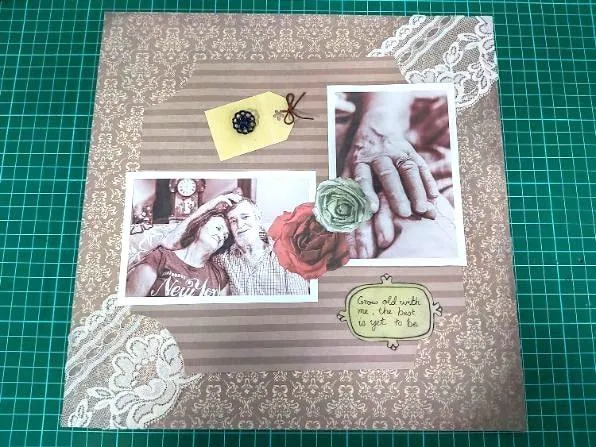
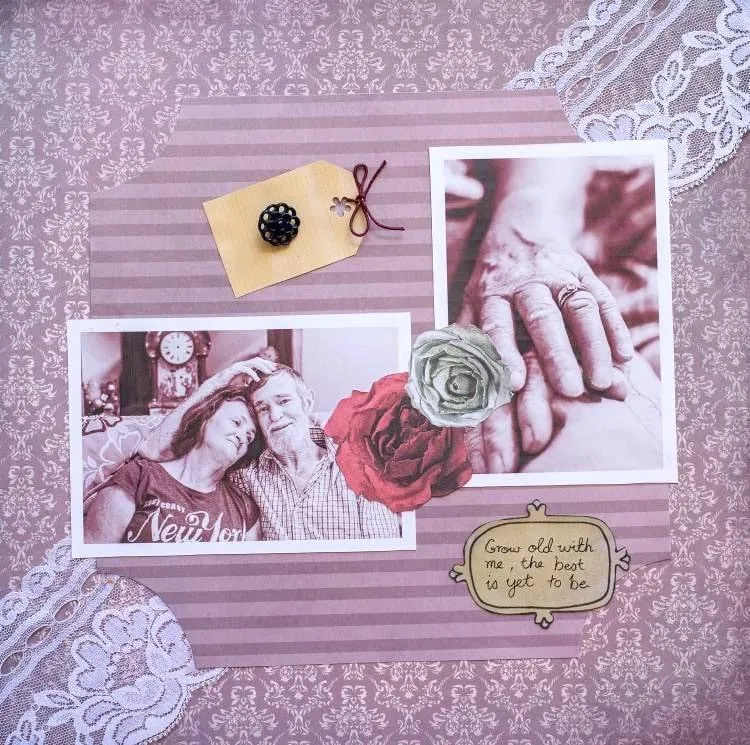
Today I'm going to show you how to make this vintage scrapbook layout.
I just love everything about the art of vintage-themed scrapbook pages, from the sepia colors to the beautiful vintage-looking cards, and the opportunity to make some really unique and personalized embellishments.
But possibly my favorite thing is strolling down memory lane as we choose our photographs which inspires me to have some wonderful scrapbooking ideas!
The inspiration behind this old-fashioned layout is a layout idea sketch from the book, 525 New and Inspiring Scrapbooking Sketches, as seen below.
Table Of Contents:
1.Steps and Tips
2.Vintage Layout
3.Borders
4.Tag and Wording Embellishments
5.Arranging Your Elements
6.Outcome
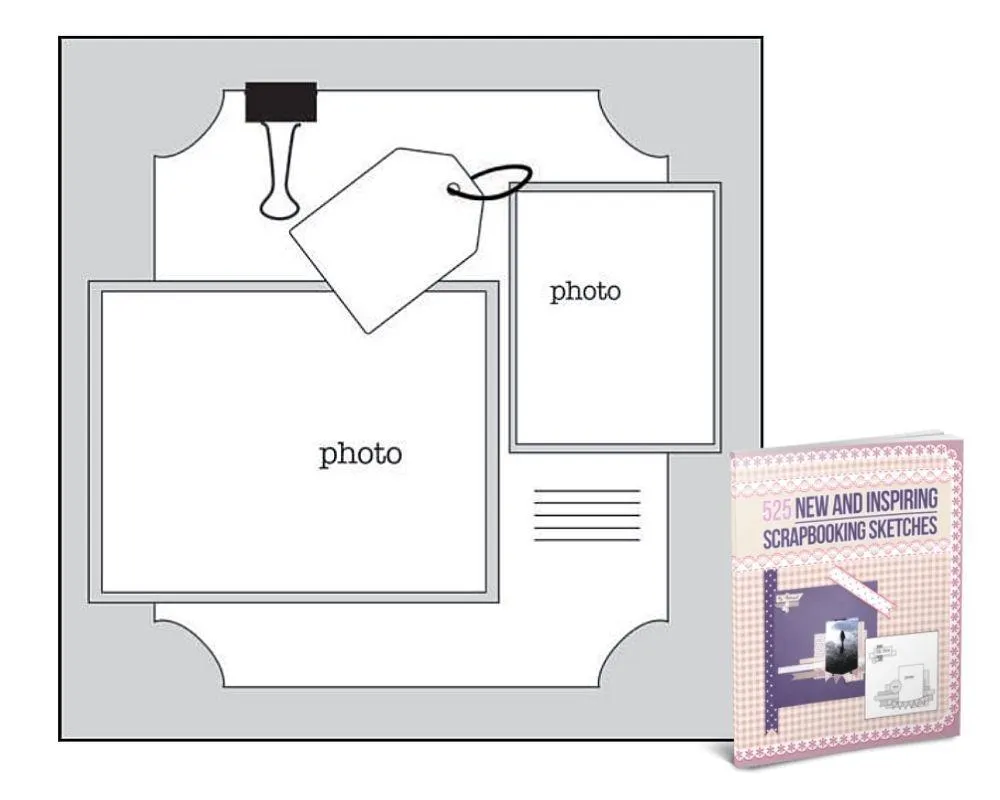
Use this template as a blueprint for your vintage scrapbook layout!
Let's start putting together the elements of this vintage scrapbook theme layout!
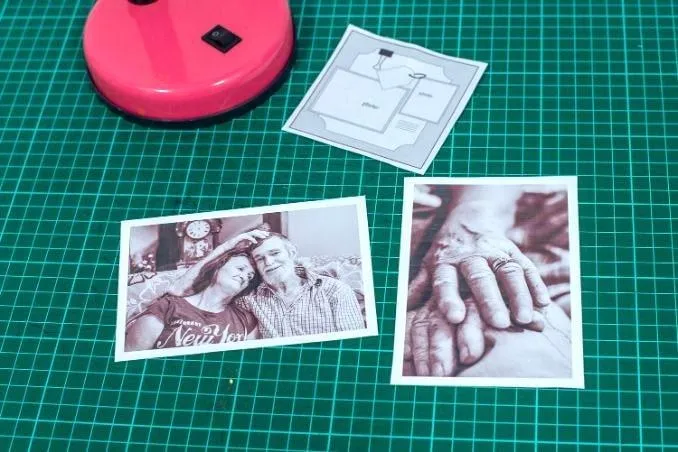
First, let's look for an old album and choose two vintage-looking photographs of your loved ones like your great-grandmother, for example. I have chosen two photos of my mother and step-father from years ago which I just adore, particularly the photograph of their aging hands and mom's sparkling wedding ring.
Again, when scrapping, you can actually start by taking photos simply for scrapbooking.
Although these photographs were taken quite some time ago, they are not technically what I would consider vintage. So, if like me, your photographs aren't vintage, we can change them up a little so that they appear vintage.
I have printed mine in sepia tones to give the vintage-themed layout more of an old-fashioned feel but you could also use a filter before printing them, print them in black and white, or even leave them as is but focus on vintage embellishments.
Want to learn more amazing layout techniques? Click here and check out more new and inspiring scrapbooking sketches and layouts!


Easy Steps and Tips to Creating Vintage Scrapbook Page Layouts
When choosing classic-looking photographs for vintage-themed scrapbook layouts, try to select a photograph that doesn't have anything modern in the background such as a flat-screen TV.
Scan your vintage photo and use the printout to avoid damaging the original!
Okay, now that you have chosen the perfect photographs, let's move on to the cardstock.
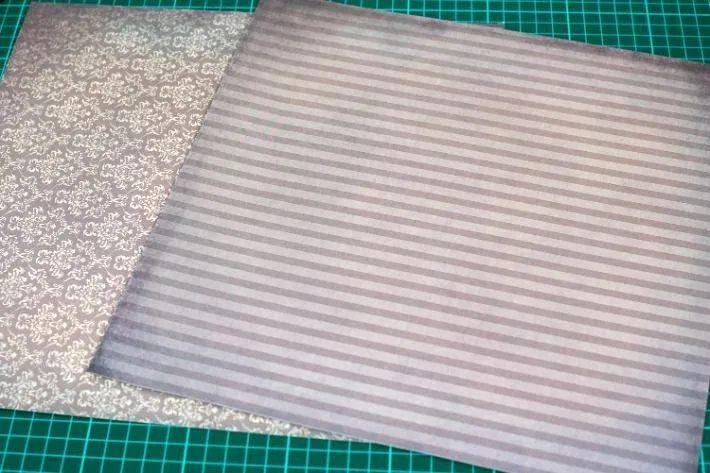
For this particular vintage layout, you only need two pieces of cardstock. I had purchased this set of vintage-look cardstock over a year ago so I was really excited to finally have a project to use it on.
These two sheets are exactly the same but have a coordinating print on the reverse side, making it really easy to find patterns that look good together. I have stuck with a brown/sepia theme to compliment the vintage feel.
There are plenty of vintage style cardstocks available online!
Now, grab the cardstock that you wish to use as your second contrast layer and flip it over so that we can draw a template on the back before cutting it out. I don't recommend drawing the template on the side you will see due to the pencil marks. Even if you use an eraser on them, it often still leaves a tell-tale mark.
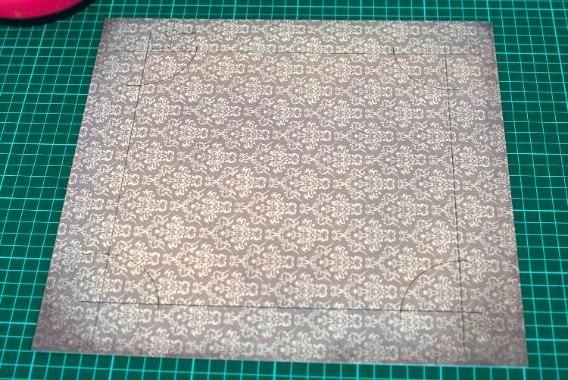
Now although it's a little hard to see in the photographs below, start by drawing a line 1.5 inch in from each side of your cardstock. Remember, the photograph below is of the reverse side of my paper and the stripe card seen in the finished product as it's on the other side.


Make sure to draw the template at the back of your cardstock!
Once you have drawn your border, mark two dots, 1.5 inches in from each corner on the line you have just drawn. Now, grab something round to use as a template (I have used a large sticky tape roll), and line it up against the two dots as per the photograph below.
Now you can draw a perfect arc on the corner! Do the same for all four corners.
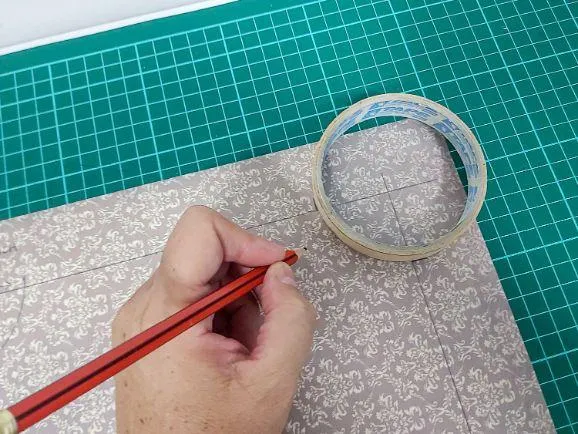
Use a pencil when drawing your markings
The finished template will look like this. Using either a craft knife and cutting mat, or some sharp scissors, cut out your shape.
It should look like a smaller square with a bite taken out of each corner. This is what it looks like cutout and flipped over to the correct side!
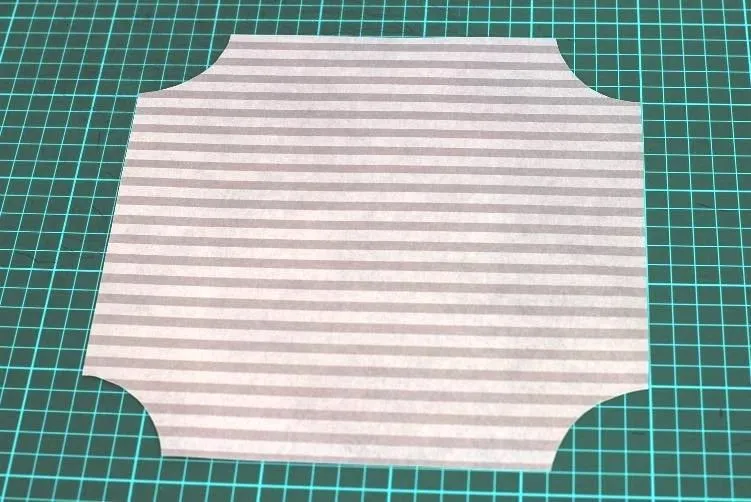
Make sure to use a sharp cutting tool to avoid tears
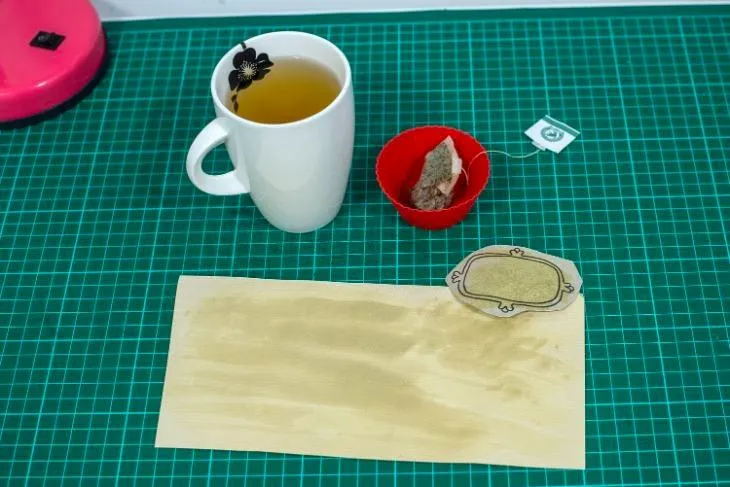
Next, we are going to work on our tag and wording embellishments. These should both appear vintage or old-fashioned so we are going to stain our cardstock with tea to give it a kind of yellowing, old-fashioned look.
I am staining a scrap of cardstock and an old-fashioned hand-drawn frame which I printed directly onto the cardstock.
So ... go make yourself a cuppa and make sure to squeeze the tea-bag out and bring it back to your scrapbooking table.
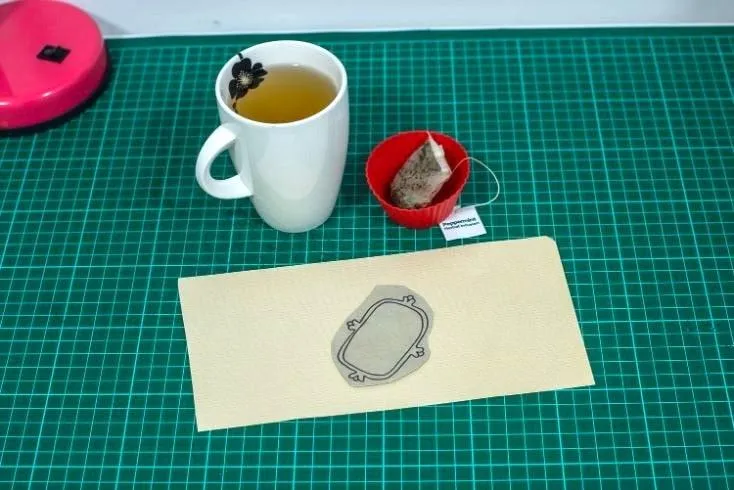
Now, I'm going for a subtle effect for this particular vintage scrapbook page, so I have used mint-tea. If you would like a darker, grungier type vintage feel to your embellishments, go ahead and use black tea or something darker.
Give your tea-bag one last squeeze and then drag it and dob it on your cardstock in any manner you please.
You can also use coffee for a darker stained effect.
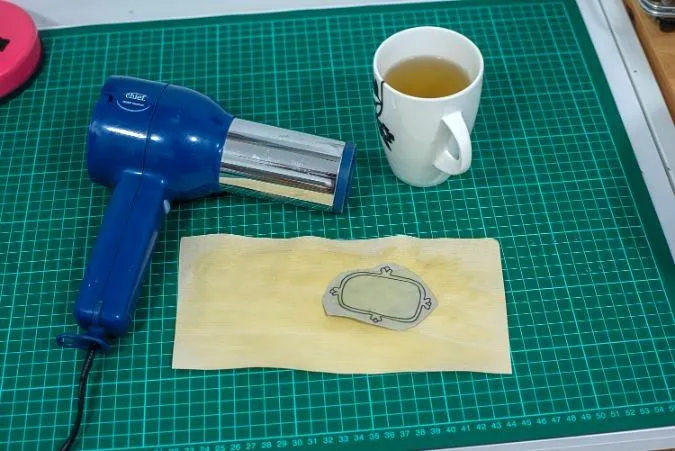
Then, go and grab a hair dryer or a heat gun and dry your card. Another great tip is to hold the heat gun or hair dryer in one spot so that it kinda singes the paper, leaving a nice vintage-looking brown spot.
My hairdryer just didn't have the gumption to get hot enough to do this so next time, I'll go and get the heat gun out of the shed.
Another great way to ''age'' your cardstock is to stick it in the oven for a couple of minutes however, you need to wait by the door and watch it as there is often less than a minute between ''perfect vintage'' and ''burnt''.
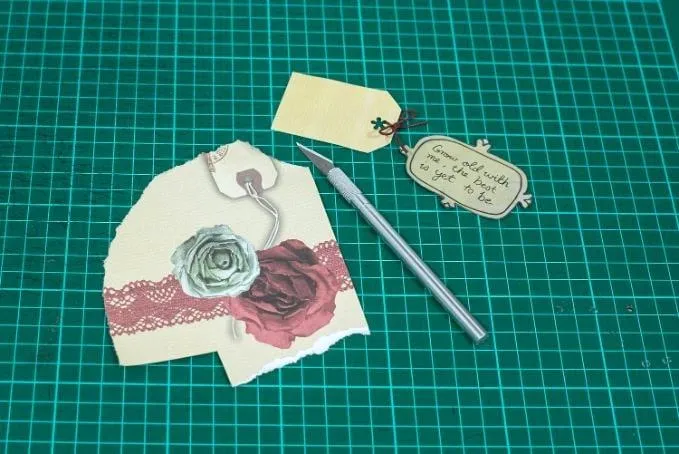
Now it's time to finish off your tag and wording embellishments. Cut them out, write your message and add any other little bits and pieces. I punched a hole in the top of my tag and tied on a bow from a scrap piece of cord.
The wording handwritten inside the frame was taken from the book, 10,000 Instant
Scrapbook Page Titles and reads, ''Grow old with me, the best is yet to be.''
You will see from the photograph below I also found another scrap piece of cardstock that I thought looks great as an embellishment for our vintage-themed scrapbook page.
Next, gather all your supplies and get ready to piece your vintage scrapbook page together. Feel free to grab any extra embellishments. As you can see from the photograph below, I also grabbed a scrap of lace and a vintage button.
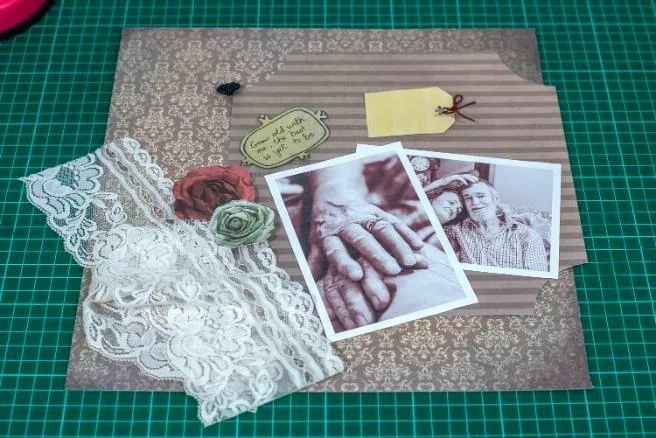
Use embellishments that fits well with the theme and color of your page.
Now comes the fun part ... arranging your elements on the cardstock! You can follow this idea as loosely or closely as you wish. I followed a scrapbooking sketch (mentioned earlier) fairly closely but also decided to add some extra elements that were not in the original sketch.
I really hope you have found some inspiration with this vintage scrapbooking layout and would love to see you make your own scrapbook page. Happy scrapping!
OUR BEST SELLING BOOKS


HERE'S SOME OTHER SCRAPBOOKING ARTICLES THAT YOU MAY FIND HELPFUL
The Top 5 Scrapbooking Tools That Are Proven To Help You Create Better Layouts
12×12 Scrapbook Layouts Tips You Should Never Miss!
5 Tips To Creating Catchy Scrapbook Titles For Your Layouts
TOP 5 Scrapbooking Ideas I LOVE!
How to Scrapbook: The Ultimate 'Learning How to Scrapbook for Beginners'
Scrapbooking Tips: 10 Tips To Help You Create Even More Enchanting Pages!
5 Simple Scrapbook Organization Ideas and Tips!
Scrapbook Stores Online: Shop from the Top 7 Best Craft Stores
Contact Us | Login | Store | About | Reviews | Privacy Policy | Terms & Conditions | Returns
Copyright © 2025 by ScrapbookingCoach.com
We accept payment with:
