
Scrapbook Layouts: 6 Ideas To Inspire You!
Looking for fresh ideas to create unique 12×12 scrapbook layouts?
Look no further! These scrapbooking ideas will help you create simple scrapbook layouts that look amazing without the headache!
For even more amazing layouts, you can check out our catalog of books here.
Idea 1. Utilize different shades of one color. Make photos pop on your scrapbook layouts.
When designing a 12×12 scrapbook layout, if your photos contain a lot of different colors, consider utilizing different shades of one color throughout the layout.
For example, you want to put together a layout of your child's fifth birthday party.
Use dark green as the background and pale green as matting for your photos. Use the same pale green for journaling, but add a scrapbook border of darker green or green that has a pattern to it.
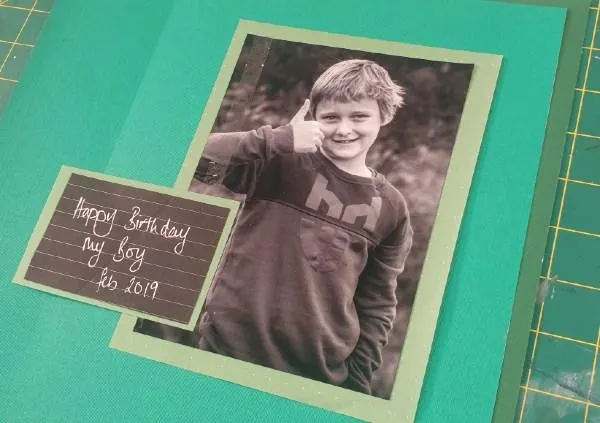
Here we use different shades of one color in the layout.
By utilizing one main color, it will really let your photos pop. If you're a fan of a colorful scrapbook page, you can visit this page for examples of disney scrapbook layouts! See how multiple colors can also bring fun to your scrapbook album pages.
Idea 2. Bring attention to details of a photo . Enlarge photo.
Quite often 12 × 12 scrapbook pages will contain just one or two photos.
As you sort through your collection of photos and you come across one that is absolutely your favourite, decide what it is about the photo that catches your attention.
Is it the person's smile? Is it how your baby curls his toes? Is it the bright pink rubber boots that your little girl is wearing as she stomps into a mud puddle? Is it a beautiful wave coming from the beach? Or is it a puppy pulling on a ribbon from a present with his teeth?
These little things and details have a beautiful story behind them that can open up plenty of
scrapbook ideas.
12x12 Scrapbook: Consider using one photo per layout
4 Photo Layout Design Tip:
♥ Adhere one matted photo to the bottom right corner of your scrapbook page, with an inch border to the right and bottom of the photo
♥ Adhere two photos to the left of the starting photo, with a quarter-inch border between them.
♥ Adhere two photos above the starting photo, with a quarter-inch border between them.
♥ Adhere the last photo above the second photo, with a quarter-inch border.
♥ Add a title to the scrapbook page and use the left side of the layout for journaling.
♥Add embellishments to your scrapbook page. But don't go overboard! When it comes to embellishments, sometimes less is more!
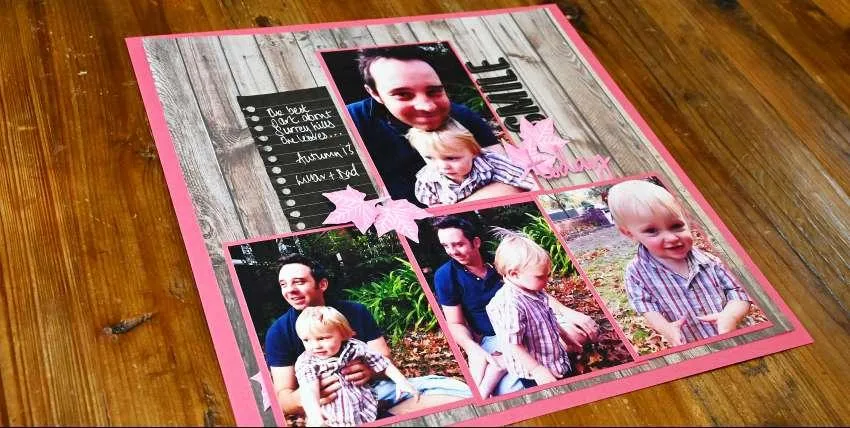
Using the 4 photo layout design tip!
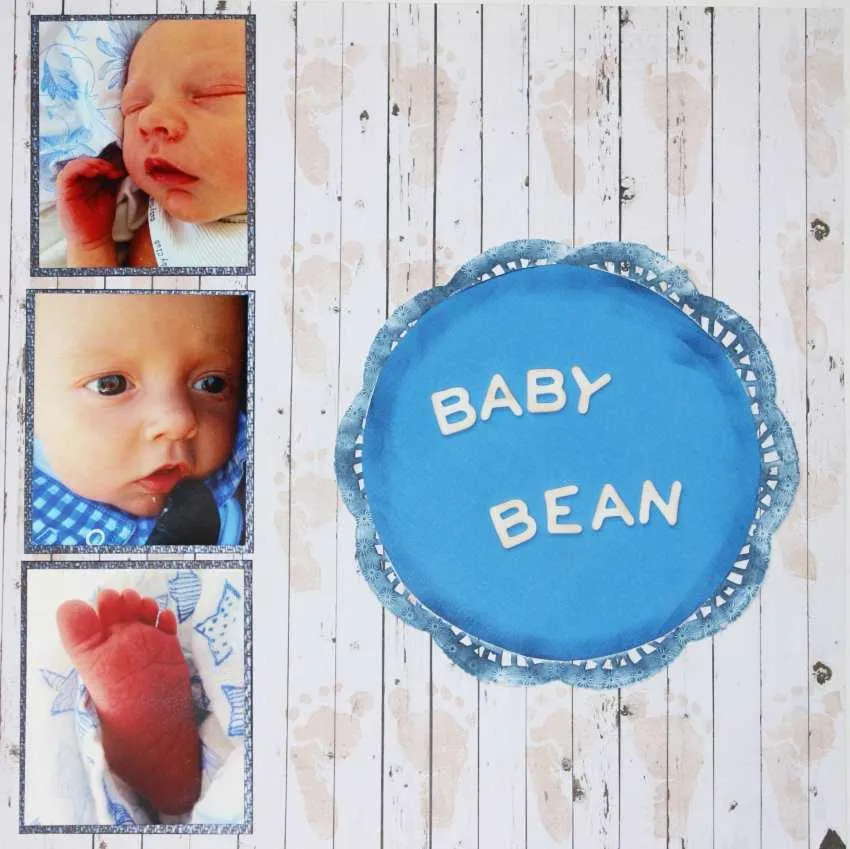
Mini Close Up Layout Design Tip:
Here's a wonderful thing you can do with your photos on your scrapbooking pages. It's easy to do and is very eye catching!
Scan a photo and then crop the photo so that it only shows the part that you really like.
Enlarge the new photo so that it is approximately the same size as the original photo. Include both the original and the close-up photo in your 12×12 layout.
Below you'll see a pregnancy scrapbook page where we used this technique!

Using the mini close up photo technique!
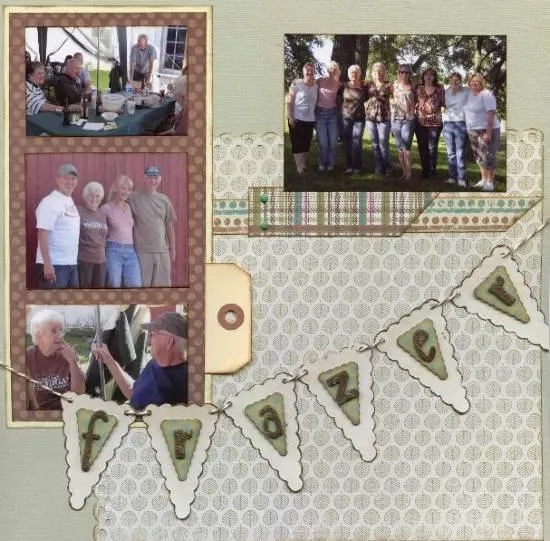
Idea 3. Stack your photos on your 12×12 scrapbook. It's all in the design.
How you choose to arrange your photos on your scrapbook pages can make the difference between an ordinary 12x12 scrapbook page and an extraordinary one.
But always make sure that you choose a focal point instead of multiple images that make your page look like dump.
For example, you can make a creative stunning layout as follows:
♥ Crop 6 photos into 3 x 3 inch squares. Mat each photo with a quarter-inch border, using the same matting for each photo.
♥ Use circular elements as the foundation of your design. Here are five scrapbook examples pages using circle elements.
♥ Choose a background design that you love and one that complements the matting.
♥ For more inspiring - check out our scrapbook sketches book.
On this layout, we created a focal point by stacking photos!
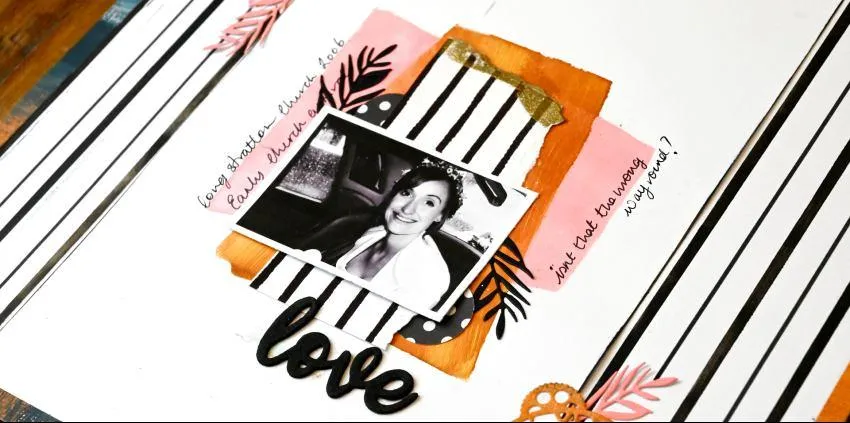
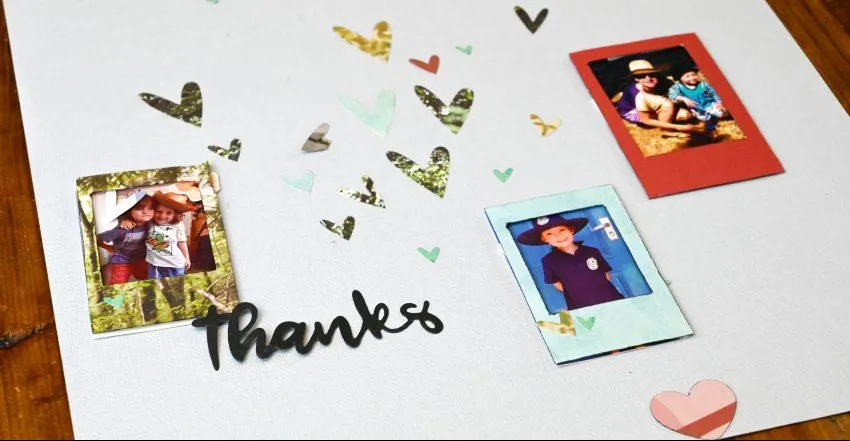
Idea 4. Enhance photos with flowers. Overlap photos.
Do you tend to mat your photos and leave empty spaces around them? One of my favorite scrapbooking ideas is to overlap photos with flowers.
This way it draws more attention to the photo and really makes it your focal point.
You could start with just a few flowers overlapping one of the corners of a photo, or actually creating a border that goes all the way around a photo.
By overlapping, it provides dimension to your photos and helps the photos to blend into your
12×12 scrapbook layout.
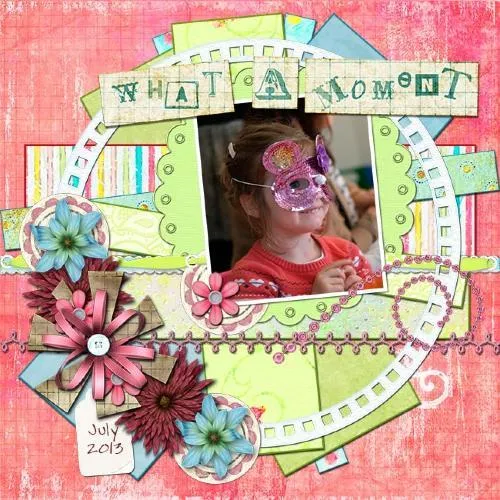
Use a flower to anchor the photo and balance out the design!
Discover how to create a beautiful patchwork background on any 12x12 scrapbooking layout. Click the video below to watch how...
Idea 5. Include different poses . Capture the looks.
When creating a 12x12 layout for one person, you can create a fun and eye-catching layout by incorporating photos of different poses.
1. For starters, you can choose a large photo (3 x 5 or larger) that you want to use as the centerpiece on your scrapbook page.
2. Then create an elaborate border for the left side and top of the photo and adhere the items near the upper left corner of the page. If you need it, we've got a help guide on glue for scrapbooking.
3. Next, you want to crop three additional photos into 3 x 3 inch squares as your focal point and mat the photos.
4. Add them horizontally to the bottom right corner of the photo with the first photo just overlapping the large photo.
5. Add the person's name to the upper right corner of your scrapbook page and journal on the lower left side.
It's a great page if you're looking how to make your own scrapbook from scratch.
Use different poses in each of your photos to capture different looks!
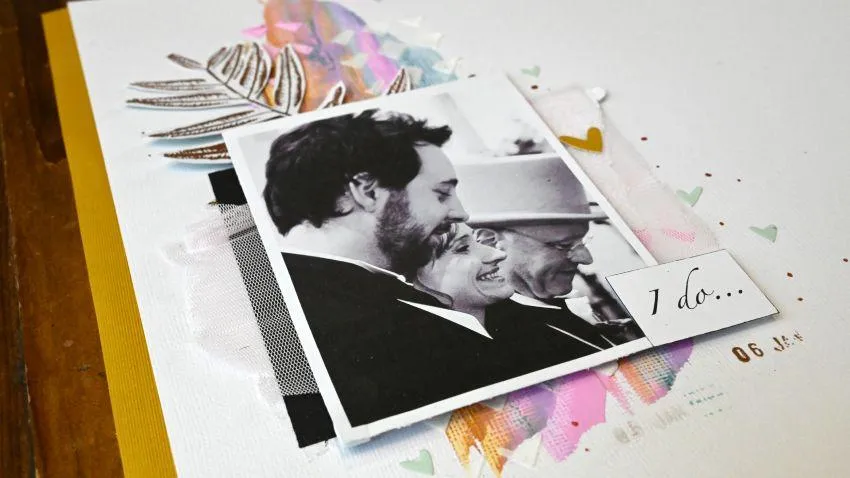
Idea 6. Add a vintage appeal to your 12×12 scrapbooking layout!
Wondering what to do with the old photos that you recently came across? Create beautiful 12x12
vintage scrapbook pages. Here are some easy steps to follow:
♥ Choose a 12 x 12 sheet of a scrapbook page that has a vintage style to it. It might be a crackled green paper, a page with lace, or wrinkled cardboard.
♥ Turn the paper over and trace a 3 x 3-inch square template on three or four random places. Carefully poke a hole through each square and cut the paper from the hole to one of the edges of the square. Retrace the square several times with a pen or pencil until you're able to carefully rip the square from the paper. When you rip, it will leave a ragged edge which is what you want.
♥ Center a photo, facedown, over each square and tape into place. Use black and white photos here if possible!
♥ Flip the scrapbook paper over and adhere it to the scrapbooking page backing. Add a border to the page. You can use a simple solid border made out of cardstock, or any pre-purchased scrapbook borders.
♥ Add a title to the scrapbook page and embellish with old buttons, lace, and other antique looking trinkets.
Note: Want more scrapbooking ideas? Check out our article about sports scrapbook ideas and learn tips on how to create amazing sports themed scrapbook spreads!
When creating a breathtaking 12 x 12 scrapbook album, don't try to 'think' of scrapbooking ideas, just focus on what inspires you!
Spend time looking at the photos and replaying the memories in your mind. And in most cases, the scrapbooking ideas should flow naturally.
If it's a particular photo, consider whether you want to use it as the only photo for a layout or if there are additional photos that you want to put along with it.
If you're inspired by beautiful embellishments, play around with grouping different items together and then decide what else you can add to the page.
If you're interested, we've got an amazing guide on samples of scrapbooking layout templates here.
I hope these 6 stunning scrapbooking ideas have inspired you to create even more scrapbook layouts.
OUR BEST SELLING BOOKS


SEEN OUR BEST SELLING BOOKS?


HERE'S SOME OTHER SCRAPBOOKING ARTICLES THAT YOU MAY FIND HELPFUL
The Top 5 Scrapbooking Tools That Are Proven To Help You Create Better Layouts
12×12 Scrapbook Layouts Tips You Should Never Miss!
5 Tips To Creating Catchy Scrapbook Titles For Your Layouts
TOP 5 Scrapbooking Ideas I LOVE!
How to Scrapbook: The Ultimate 'Learning How to Scrapbook for Beginners'
Scrapbooking Tips: 10 Tips To Help You Create Even More Enchanting Pages!
5 Simple Scrapbook Organization Ideas and Tips!
Scrapbook Stores Online: Shop from the Top 7 Best Craft Stores
Contact Us | Login | Store | About | Reviews | Privacy Policy | Terms & Conditions | Returns
Copyright © 2025 by ScrapbookingCoach.com
We accept payment with:
