
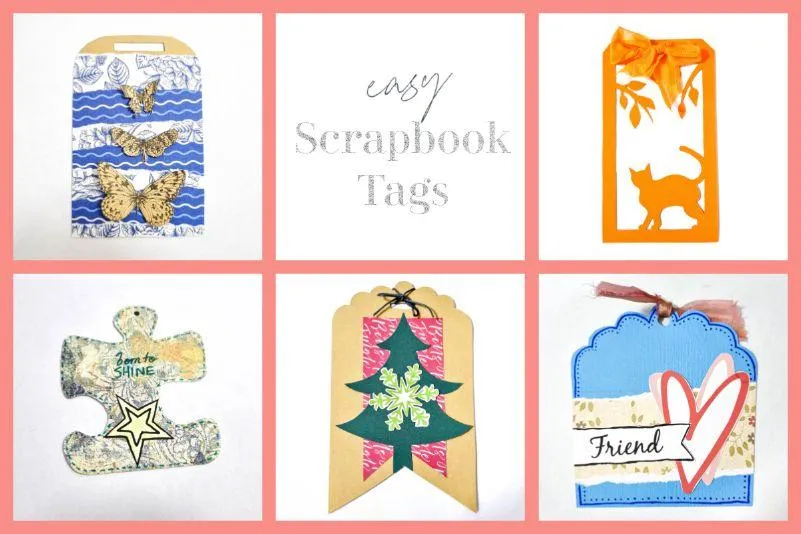
FIVE EASY SCRAPBOOK TAGS YOU CAN CREATE FROM YOUR LEFTOVER CARDSTOCKS/PAPER
Make your own tags by making use of your scrap pieces of paper and cardstocks!
Scrapbook tags are a versatile embellishment that works with any layout as they can be designed and decorated to suit your page. You can use large scrapbooking tags as a photo mat and smaller ones can be used with stickers to showcase your title. Me? I love decorating them in the theme of my page as an embellishment.
TABLE OF CONTENTS:
1.Shapes And Sizes Of Tags
2.DIY Scrapbook Tags
3.5 Easy Tags You Can Make
4.Use Torn Strips Of Paper
5.Forget Tradituinally Shaped Tags
6.Cut Out A Silhouette
7.Use Tags To Show Off Your Title
8.Use Themed Patterns And Imagery
9.Final Thoughts
SHAPES AND SIZES OF SCRAPBOOK TAGS
Although scrapbook tags are commonly rectangle-shaped with an eyelet at one end, they also look great as other shapes such as squares, circles, ovals, hearts, stars, etc. The size of a scrapbook tag is also completely up to you. Large ones make a great background for photos and journaling, and tiny little ones can even be made into a strip of bunting or used as a border.


DIY SCRAPBOOK TAGS
Although you can purchase pre-made blank tags in uniform shapes, making your own scrapbooking tags as a project DIY scrapbook embellishment ideas is a fantastic way to get creative, save money and use up your leftover cardstock and paper. Scrapbooking tags can be hand-drawn and cut, created with a tag-shaped paper punch, or even cut with a die-cut machine.
FIVE EASY SCRAPBOOK TAGS THAT YOU CAN MAKE YOURSELF
To show you just how easy it is to make your own scrapbook tags, here are five tag ideas that you can incorporate into your own DIY scrapbooking tags using your leftover cardstock and paper.
#1 - USE TORN STRIPS OF PAPER
Using torn strips of paper is a great way to use up your scrap paper and add interest to your scrapbook tags. You can see in the photograph below that I have used two different patterns of torn paper as the background with three simple butterfly cutouts as a feature.
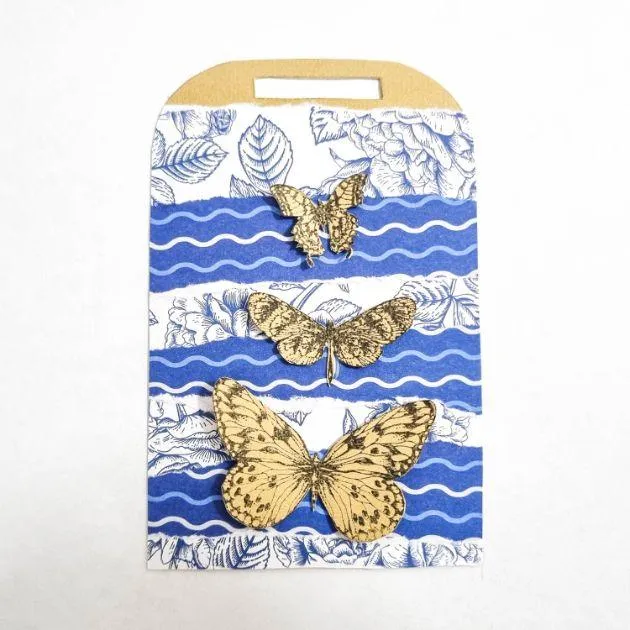
Make your tags stand out by adding cutout embellishments!
WHAT YOU'LL NEED AND HOW TO DO IT
You will need:
➤Plain colored cardstock for the base
➤Butterfly stamps and ink
➤Pencil and ruler
➤Glue stick
➤Craft knife or scissors
➤Scrap pieces of patterned paper
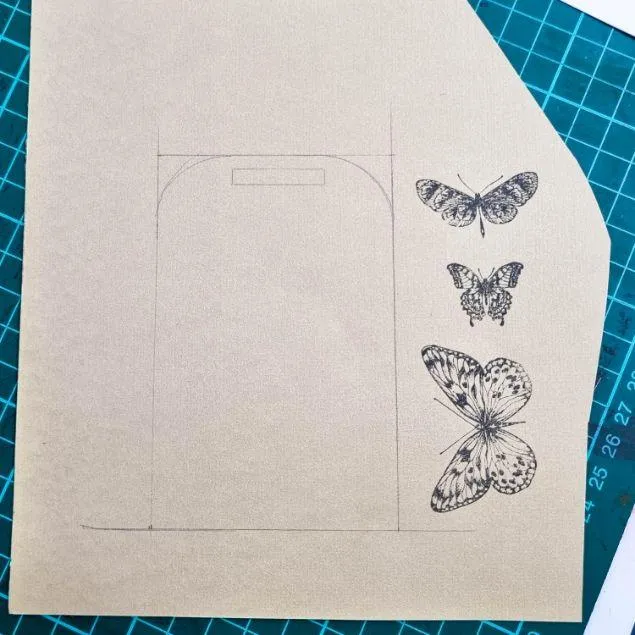
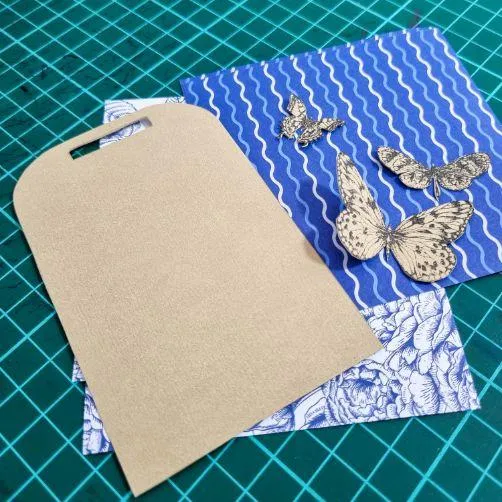
Start by creating your tag from your cardstock base. As you can see from the image below, I simply hand drew mine using a ruler and pencil. Make use of any spare bit of cardstock to stamp your three butterflies and using a pair of scissors or a craft knife, cut out the tag and three butterflies.
Next, choose some patterned paper scraps and tear them into uneven strips. Finally, lay all of your elements on the page and when you are happy with the layout, glue them down with your glue stick to finish off your scrapbook tag.
#2 - FORGET TRADITIONALLY SHAPED SCRAPBOOK TAGS
There is no official rule that says scrapbooking tags need to be rectangular, and if there was, it would be one of those rules that are made for breaking. As you can see in the photograph below, this scrapbook tag takes on the shape of a puzzle piece.
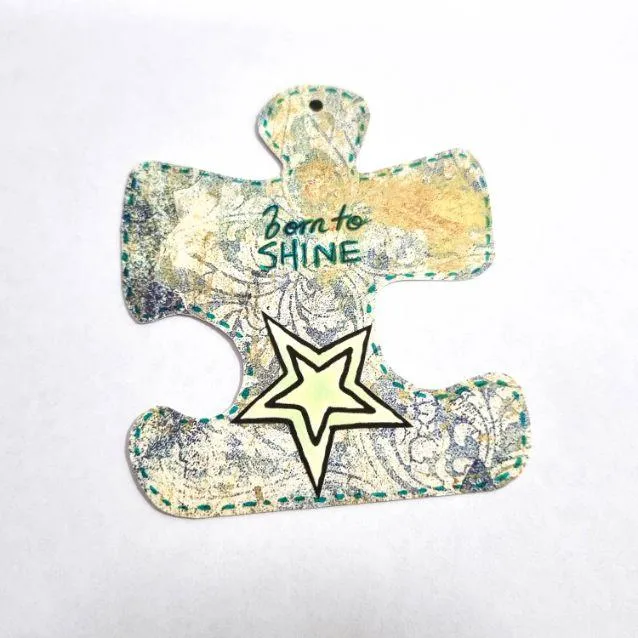
Traditional tag shapes can be boring! Get creative and experiment with your scrapbook tag shapes!
WHAT YOU'LL NEED AND HOW TO DO IT
You will need:
➤Plain or patterned colored cardstock for the base
➤DIY printable star shape
➤Pencil
➤Craft knife or scissors
➤Markers
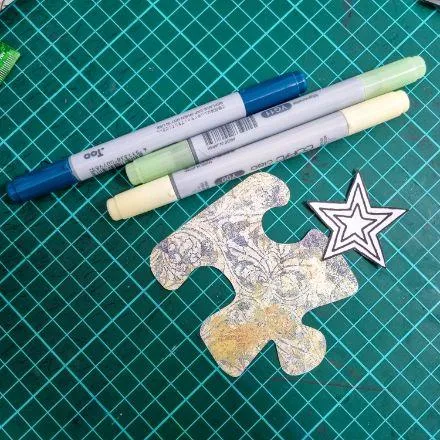
Start by hand drawing a puzzle piece shape onto the back of your cardstock scrap and using your scissors or a craft knife, go ahead and cut this out.
Next, get your star shape ready by printing it out, coloring it in, and cutting it out. Adhere it to your puzzle-shaped tag with a glue stick.
Finally, using a marker, add a sentiment and some mock stitching lines around the outside of the puzzle piece to finish it off.
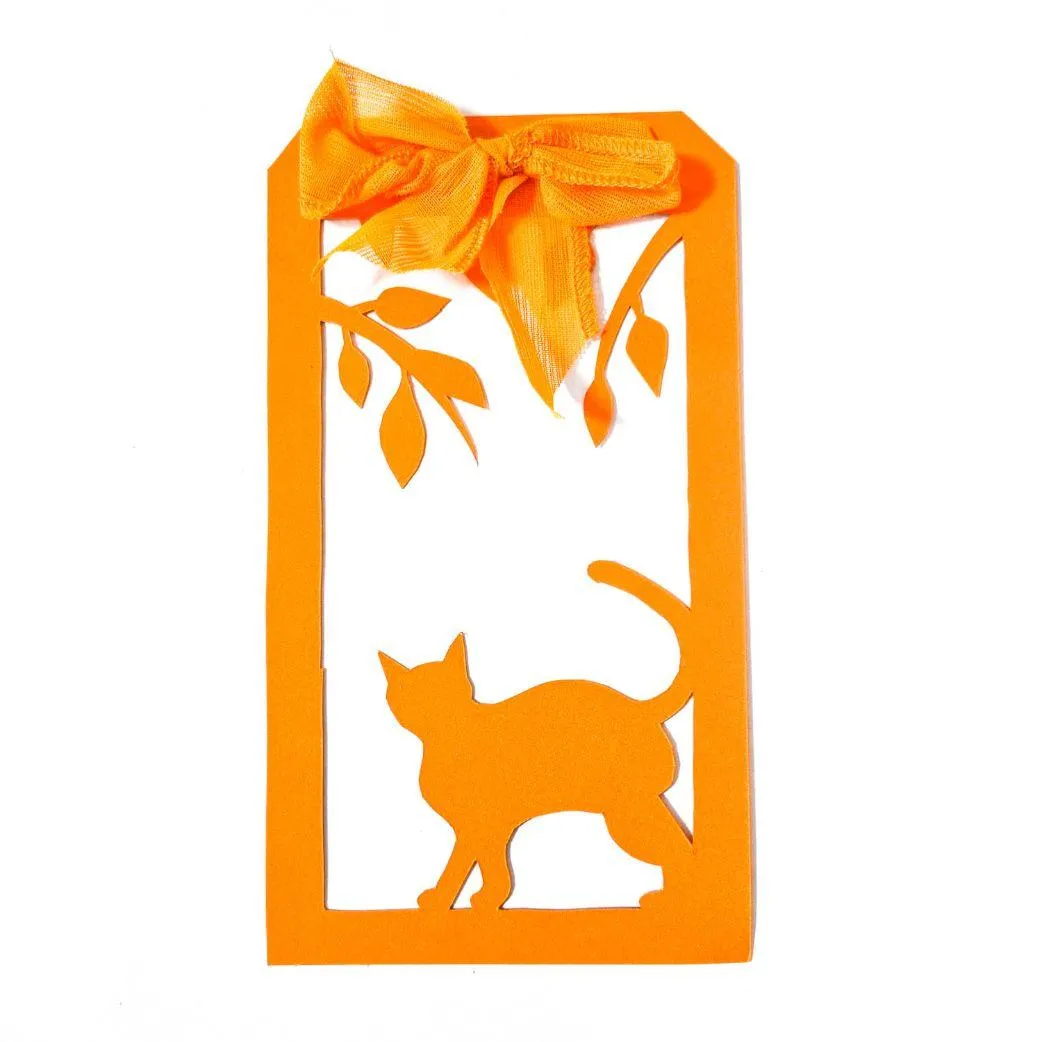
#3 - CUT OUT A SILHOUETTE
For this Halloween-themed scrapbook tag, I made use of a bold orange-colored scrap piece of cardstock and went with a silhouette cut out.
WHAT YOU'LL NEED AND HOW TO DO IT
You will need:
➤Plain or patterned colored cardstock for the base
➤Simple silhouette image to trace onto your cardstock
➤Ruler and pencil
➤Craft knife
➤Ribbon
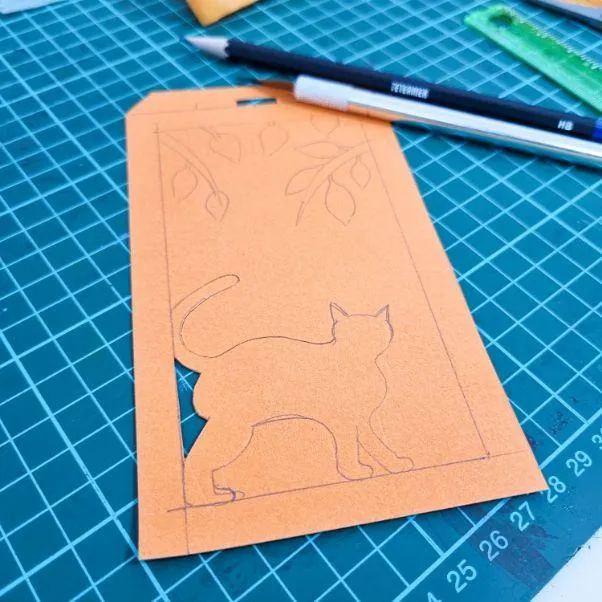
Start by drawing the shape of your scrapbook tag onto your cardstock base. Don't forget to include a rectangle inner-frame around ½ inch smaller on each side so that when you cut out your picture, there is a border holding it all together. You can see what this looks like in the image a little further down.
Next, grab the image you would like to use as your silhouette and trace it onto your scrapbook tag, making sure there are a few sections of the image that touch the border so that it stays put when you cut it out.
Then, grab your craft knife and set to work cutting it out. Remember, slow and steady wins the race when it comes to cutting out silhouettes. The image below shows what mine looked like prior to completely cutting out the middle section.
Finally, finish off your piece with a cute ribbon tied through the hole at the top.


#4 - USE YOUR TAG TO SHOW OFF YOUR TITLE
Scrapbook tags are a popular way to display your page title and it's not hard to see why.
Titles can be easily transformed from drab to fab with a simple tag and the use of letter stickers or a DIY printable.
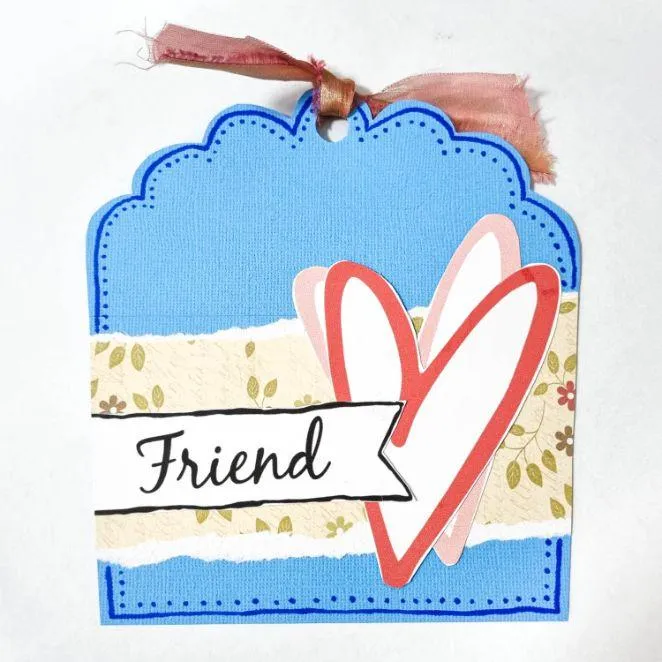
Display your title or journaling by incorporating them on your tags
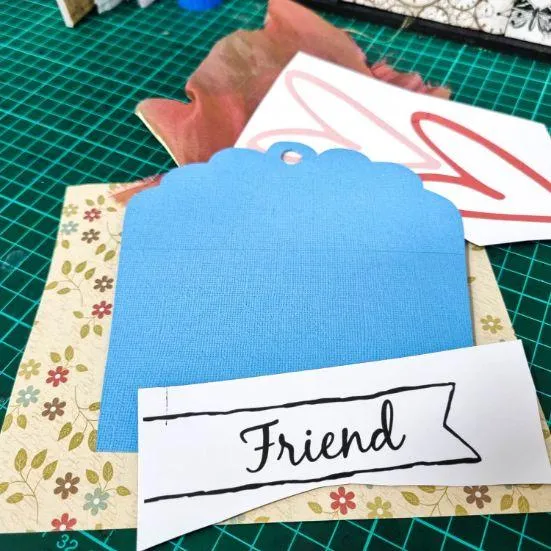
WHAT YOU'LL NEED AND HOW TO DO IT
You will need:
➤Plain colored cardstock for the base
➤A scrap of patterned paper
➤Pencil and ruler
➤Scissors or craft knife
➤Glue stick
➤DIY printable hearts
➤DIY printable title or letter stickers
➤Marker
Start by drawing the shape of your scrapbook tag onto your cardstock base, using a ruler for the straight edge. When you are happy with your shape, go ahead and cut it out.
Next, tear a large strip from your patterned paper and stick it down onto your tag with the glue stick. Grab your marker and add an interesting border around the entirety of the tag. I chose to use dots and a simple line.
Finally, cut out your DIY printables and glue them down, finishing the piece off by tying a scrap piece of material through the eyelet at the top.
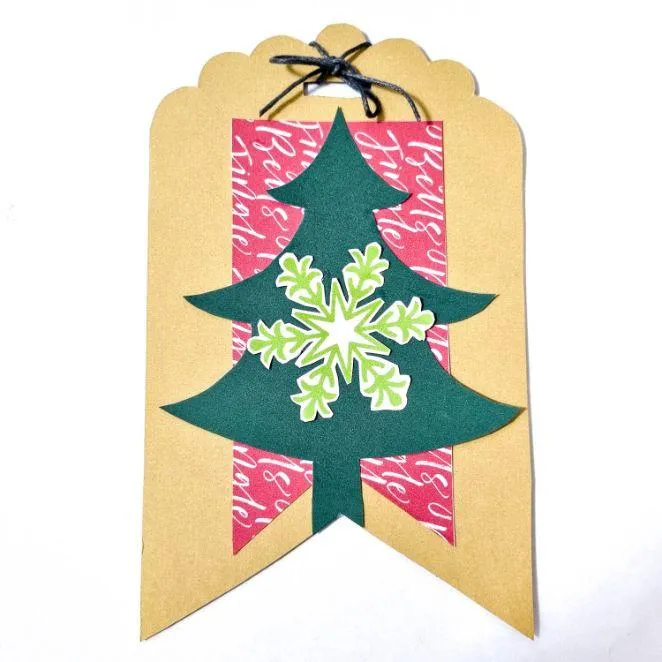
#5 - USE THEMED PATTERNS AND IMAGERY TO CELEBRATE A HOLIDAY
In the scrapbook tag below, you can see I have used holiday prints and images to make it really obvious that this layout will be all about celebrating Christmas.
WHAT YOU'LL NEED AND HOW TO DO IT
You will need:
➤Plain colored cardstock for the base
➤A scrap of themed patterned paper
➤DIY printables relevant to your theme
➤Pencil and ruler
➤Scissors and/or a craft knife
➤Glue stick
➤Craft knife
➤Twine
Start by drawing and cutting out your diy tag from the plain colored cardstock, making sure to use a ruler for the straight edges. Don't forget to cut out an eyelet at the top with your craft knife.
Next, cut your scrap of themed pattern paper to suit the shape of your tag and glue it on with your gluestick. Your printables can be cut out and adhered on top of this.
Finally, finish off your holiday themed tag with a piece of twine threaded through the eyelet.
WHAT DO YOU THINK?
What do you think? Are you ready to try making your own scrapbook tags from leftover cardstock and paper. We would love to see what you come up with.
Happy scrapping!
OUR BEST SELLING BOOKS


HERE'S SOME OTHER SCRAPBOOKING ARTICLES THAT YOU MAY FIND HELPFUL
The Top 5 Scrapbooking Tools That Are Proven To Help You Create Better Layouts
12×12 Scrapbook Layouts Tips You Should Never Miss!
5 Tips To Creating Catchy Scrapbook Titles For Your Layouts
TOP 5 Scrapbooking Ideas I LOVE!
How to Scrapbook: The Ultimate 'Learning How to Scrapbook for Beginners'
Scrapbooking Tips: 10 Tips To Help You Create Even More Enchanting Pages!
5 Simple Scrapbook Organization Ideas and Tips!
Scrapbook Stores Online: Shop from the Top 7 Best Craft Stores
Contact Us | Login | Store | About | Reviews | Privacy Policy | Terms & Conditions | Returns
Copyright © 2025 by ScrapbookingCoach.com
We accept payment with:
