Amazing Disney Princess Scrapbook Layout Using a Coloring Book
I'm going to show you how to make a gorgeous Disney Princess scrapbook layout!
After working on a mickey mouse scrapbook page recently, I am now completely and utterly obsessed with disney scrapbook layouts.
This particular layout was inspired by a photograph taken of my daughter in 2019 in Tahiti. She often wears any of the Disney Princesses' costume dresses when out and about instead of ordinary clothes and this particular day was no exception.
You most likely won't have exactly the same craft paper cutters and images as I did so feel free to change the elements of this layout using whatever you have on hand.
Okay, let's start creating the elements for this layout. We will need at least one Princess from Disney-themed image (mine is actually from a coloring book), some colored and plain cardstock, a plain colored background, your treasured photograph, some scrap card, and a few decorative craft paper cutters.
Table Of Contents:
1.Creating the First Element
2.Second Element:Background
3.Third Element: Princess-Inspired Title
4.Putting All The Elements Together
5.Outcome
Make use of your old Disney coloring book by making a
Disney princess scrapbook layout!
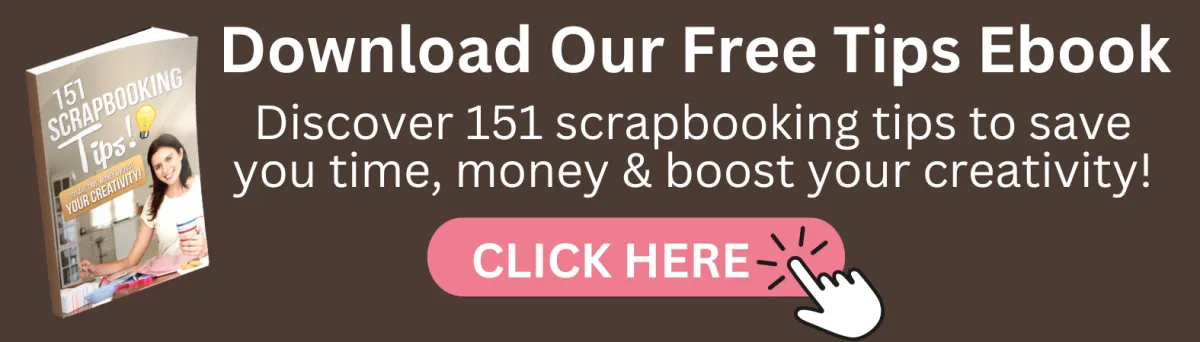
Creating the First Element: Princess Coloring Page
Begin by preparing the Disney Princessy element. In the spirit of using what I had on hand, I used a page from a painting pad that I bought for the kids a few months ago, and just cut out the image that I wanted.
You could also get images from an album, books, or magazines, purchased stickers or scrapbooking elements, or some clip-art. Don't feel like you need to use a princess, a castle, or other characters such as the seven dwarves will tie in with the theme just as well.
Want to learn more amazing themed layouts? Check out our books and discover plenty of amazing ways to design your scrapbook page!
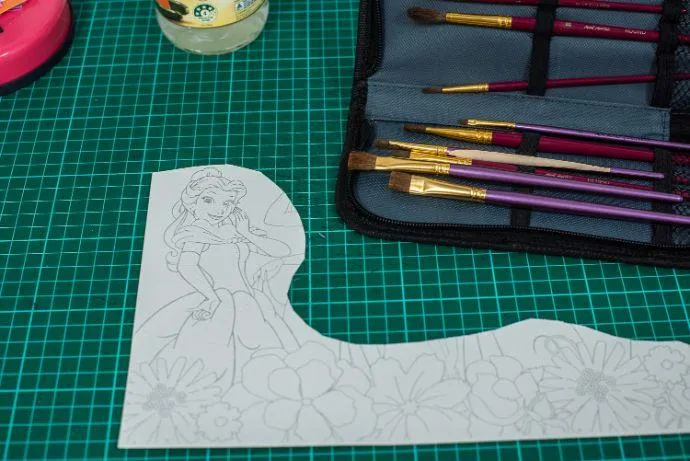
I colored the image using Derwent Inktense pencils. Inktense pencils are extremely versatile and will work on both paper products and fabric. They go on like watercolor pencils in that you add a bit of color to the princess page and then use water to create an ink-like effect.
It's fairly permanent once it's dry and you can even work over the color without affecting the previous layer.
After the Inktense was dry I traced over the outline with a thin black marker and also used a white paint pen to add some highlights. Next, I used a craft knife to cut it out.
Go ahead and prepare your materials. Here's what mine looks like colored in!
You can also use images online that you can print out!
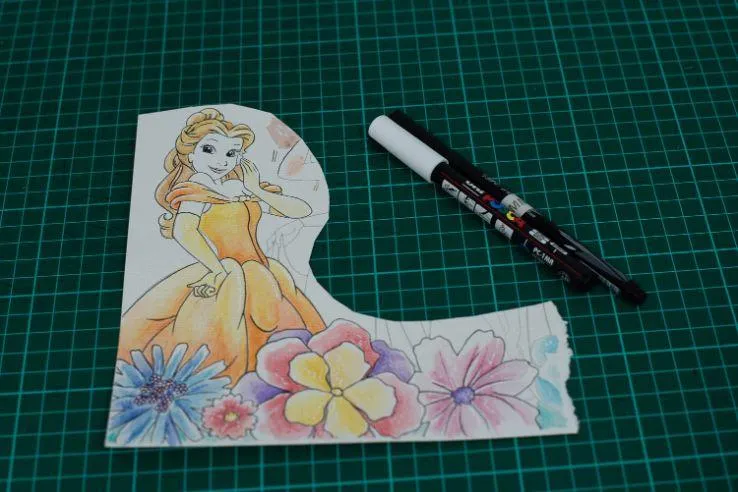
Set aside your themed scrapbook imagery and grab some sheets of cardstock for the background. I chose a bright, bold pink for the background and a dark blue and soft purplish/pinkish pattern for the scrapbook layers.
Using a craft cutter that makes pretty edges, I used it down the entire long length of both of the layers. The layers were cut to cover around one-third of the scrapbook space.
Set these disney scrapbook layout elements aside also.
Second Element: Background
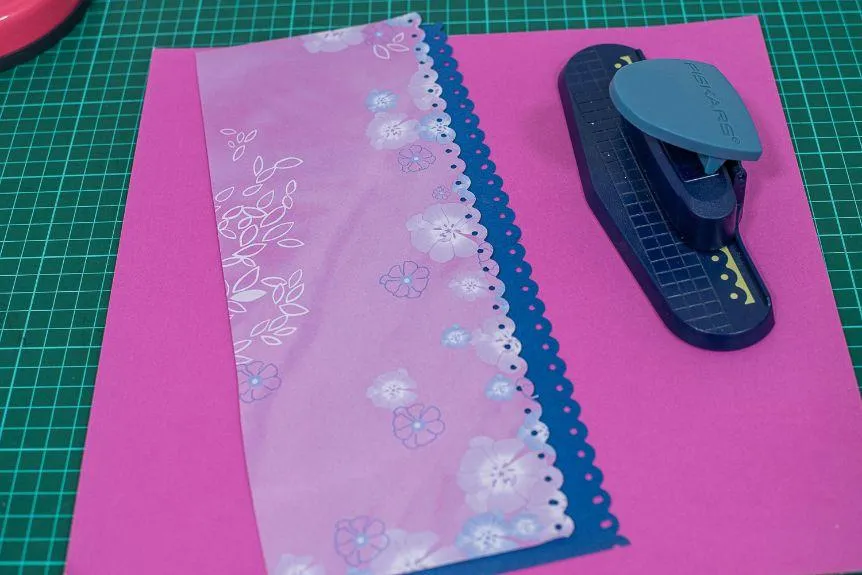
Now, let's move on to creating the simple flower elements for your princess scrap book page. I used a pretty craft cutter to cut some flower shapes in white cardstock. Out came the Derwent Inktense pencils again to give them just a little bit of color.
Once the Inktense was dry, I then cut the flowers away from the white cardstock. There are many ways to make pretty little flower embellishments and you could even use birds, butterflies .... anything really!
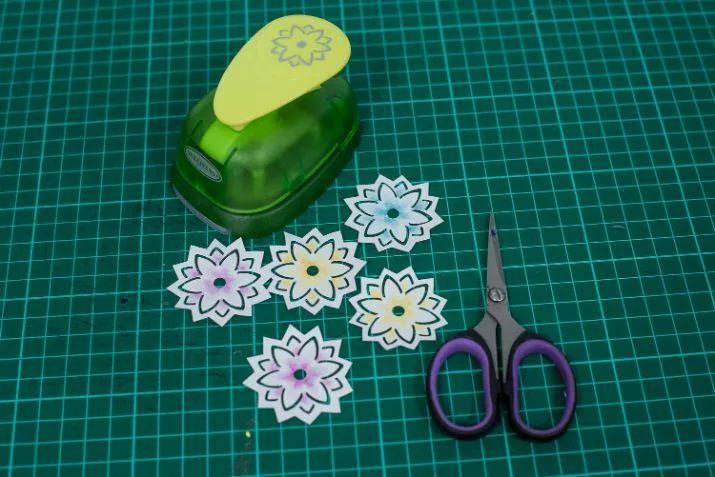
Let's set them aside and make the last element of your princess scrapbook!

Third Element: The Princess-inspired Title
The last element is the title. I was stuck on this for ages but found inspiration in the book, 10,000 Instant Scrapbook Page Titles. There is a section devoted to Disney-themed titles and I went with the simple phrase, ''Feel the Magic.''
Now my writing is terrible ... at best. I blame it on being left-handed. Basically, anytime I use a marker, my hand rubs it and smudges it as I slide my arm across the paper to write the next letter.
As a much neater solution, I created the words and border in PicMonkey, an online photo editing and content creating a program that I really love. This element was printed directly onto some bright pink cardstock.
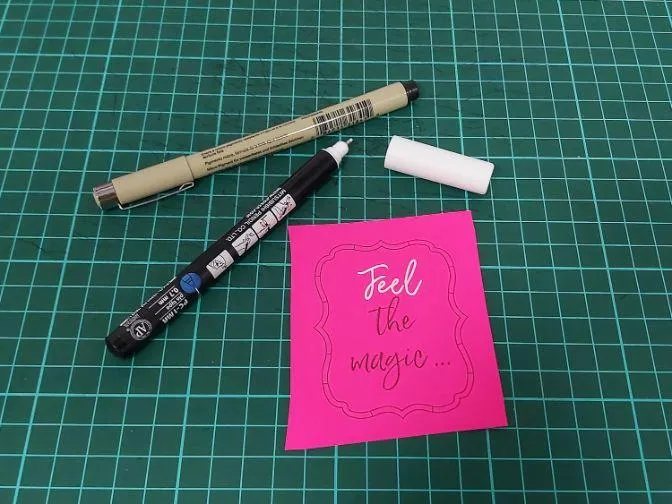
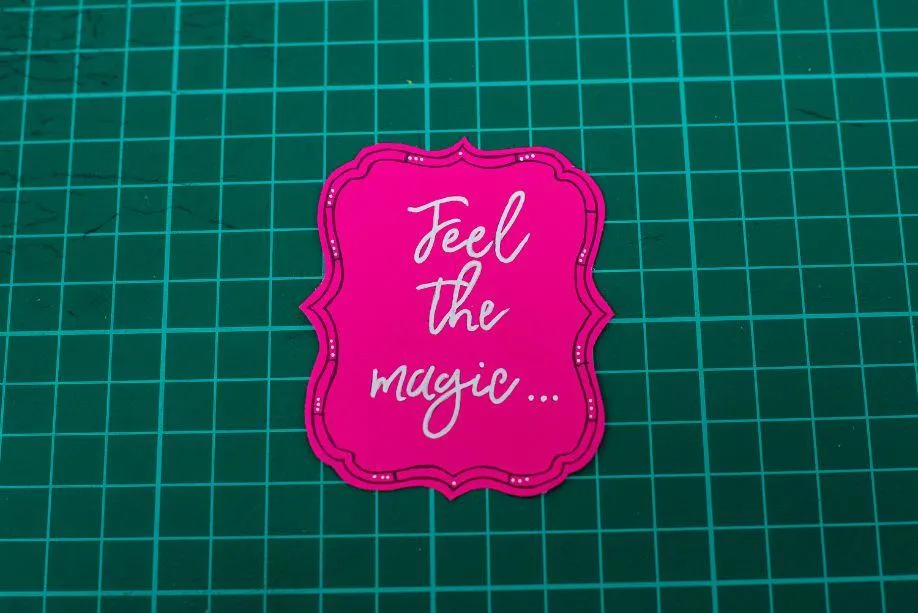
Once I printed it, the words didn't pop as much as I'd like, so I traced over the letters with a white paint pen and over the border with a black fine-line marker. If you feel comfortable handwriting your title, go ahead and do that.
If not, other alternatives include stamping, stickers, or using a cricut machine or craft knife to cut out some letters.
Here's what the finished princess scrap book title looks like!
Now comes the fun part! Gather all of your Disney scrapbook elements, put them on the table in front of you and go make yourself a cuppa. You deserve it! Just don't place your full cup on the same table as your beautiful elements. I've made this mistake more than once.
Experiment with your Disney-inspired elements by moving them around the page and re-arranging them until it's just perfect before sticking them down.
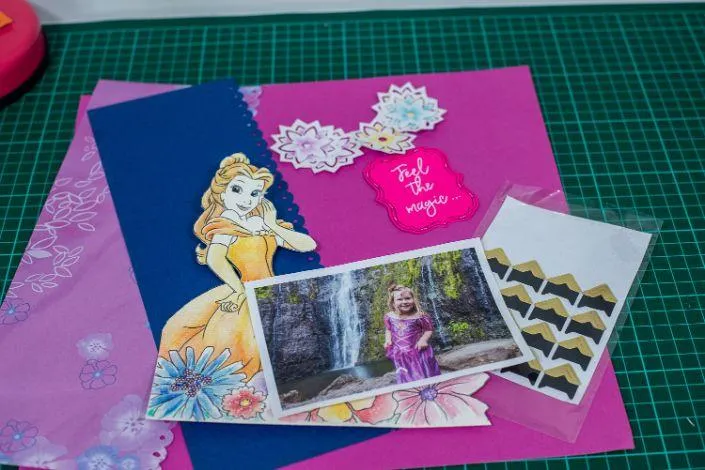
My treasured photo was printed with a white border so instead of mounting it onto another piece of colored card, I just used some simple photo corners to attach it to the page.
Feel free to be creative with mounting your photograph. If you have some Disney-themed cardstock it would make a great photo frame!

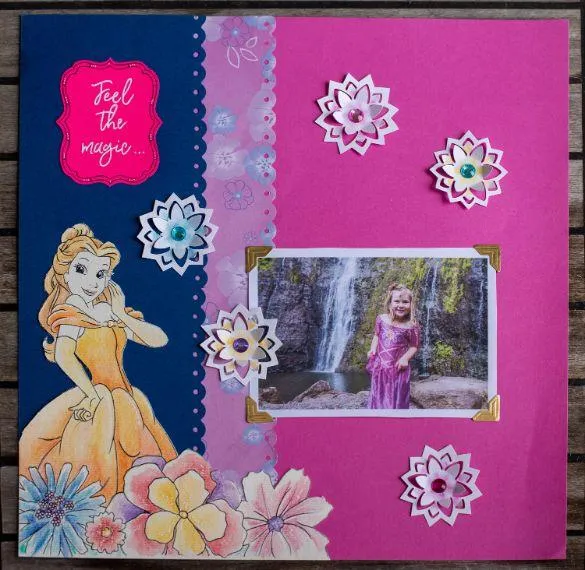
A beautiful Disney themed scrapbook layout using cut out embellishments!
I really hope you have found some inspiration with this Disney Princess-themed idea. See you next time!
OUR BEST SELLING BOOKS


HERE'S SOME OTHER SCRAPBOOKING ARTICLES THAT YOU MAY FIND HELPFUL
The Top 5 Scrapbooking Tools That Are Proven To Help You Create Better Layouts
12×12 Scrapbook Layouts Tips You Should Never Miss!
5 Tips To Creating Catchy Scrapbook Titles For Your Layouts
TOP 5 Scrapbooking Ideas I LOVE!
How to Scrapbook: The Ultimate 'Learning How to Scrapbook for Beginners'
Scrapbooking Tips: 10 Tips To Help You Create Even More Enchanting Pages!
5 Simple Scrapbook Organization Ideas and Tips!
Scrapbook Stores Online: Shop from the Top 7 Best Craft Stores
Contact Us | Login | Store | About | Reviews | Privacy Policy | Terms & Conditions | Returns
Copyright © 2025 by ScrapbookingCoach.com
We accept payment with:
