
6 FUN CAMPING SCRAPBOOK LAYOUT IDEAS
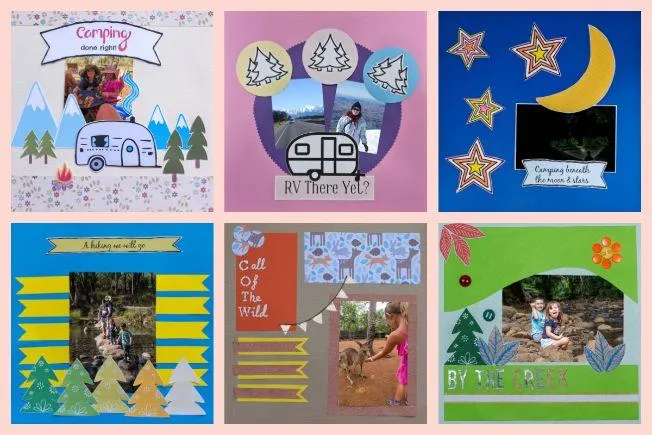
There is no denying it, celebrating your camping trips with a camping scrapbook is part of the fun. The theme is fresh, full of great outdoors imagery, and it's exactly the type of album that you will enjoy reliving the moments through decades later.
So whether your camping trip involves a luxury RV, a modest size tent, or rolling a swag out under the stars, preserve those great memories with one of these camping travel scrapbook ideas.
TABLE OF CONTENT:
1.Camping Done Right
2.A Hiking We Will Go
3. Call of the wild
4.By The Creek
5. Camping beneath the moon and stars
6.RV there yet?
#1 - CAMPING DONE RIGHT
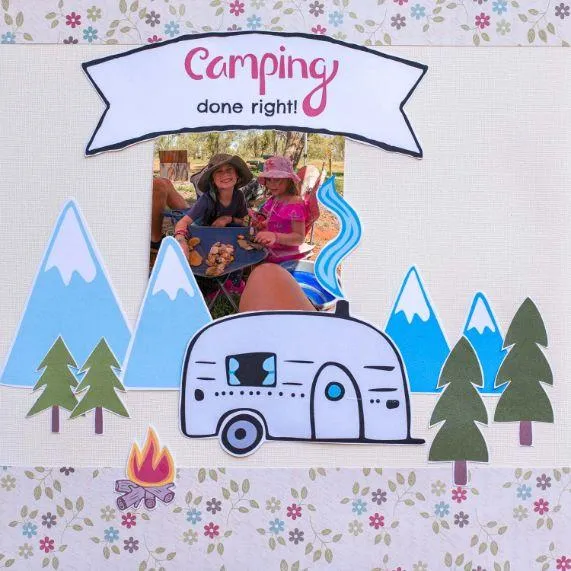
Add dimension to your layout by layering your embellishments
The photograph used for this camping scrapbook layout was from a recent camping trip through Central Australia. For those of you who don't know, the distances are vast between towns in this part of the world, and with 504 miles (812 km) between towns on our chosen route, this meant camping on some of the massive cattle farms that offer fuel and facilities to travelers.
It was a great moment as the kids had just collected a bag full of pretty rocks from a nearby dry riverbed, and I was able to sit down with my feet up for nearly an hour while they sorted them into favorites.
WHAT I USED AND HOW I DID IT
12-inch x 12-inch card stock base - Cream
12-inch x 12-inch paper - Floral print
DIY printables of camping imagery
DIY printable of my title
Glue stick
Scissors
Ruler and pencil
Putting this camping scrapbook layout together was easy and it's my favorite design from this selection of six camping scrapbook ideas.
I started by cutting out my DIY printables and the strips of floral paper to go along the top and bottom of the camping scrapbook layout. I used a ruler and pencil to mark out the floral paper strips before cutting.
Before gluing them down, I spent some time shifting them around my page alongside my photograph until I was happy with the layout. Once I was happy, I quickly adhered it to the cardstock with a gluestick before either a child or cat could come along and mess up my work.
It happens more than I'd like!
#2 - A HIKING WE WILL GO
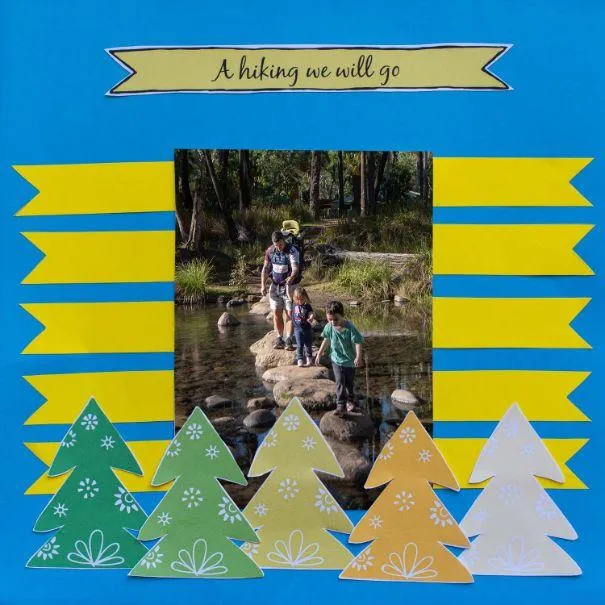
The photograph in this camping scrapbook layout was from a hiking trip at Carnarvon Gorge National Park in Australia. There were quite a few fun moments, including this one where we got to rock hop across the creek to avoid getting wet shoes. I'm pretty sure I ended up sacrificing my dry shoes so that I could help get the kids across with dry feet. It's a mom's life!
WHAT I USED AND HOW I DID IT
12-inch x 12-inch cardstock base - Blue
Scraps of yellow cardstock
DIY printables of tree embellishments
DIY printable of my title
Glue stick
Scissors
Ruler and pencil
I nearly always begin by cutting out all of my elements and this camping scrapbook layout was no exception. I used a ruler and pencil to mark out the yellow banners and just eyeballed the "V" shape at the end when it came to cutting.
Once all of my pieces were cut out, I re-arranged them on the page to make sure they looked good and then glued them down with a glue stick. I had originally intended to use 6 trees and place them on the end of the yellow strips however they printed larger than expected so I had a slight change of plan and only used 5 to fill in the page, which turned out A-Okay.
#3 - CALL OF THE WILD | THE GREAT OUTDOORS
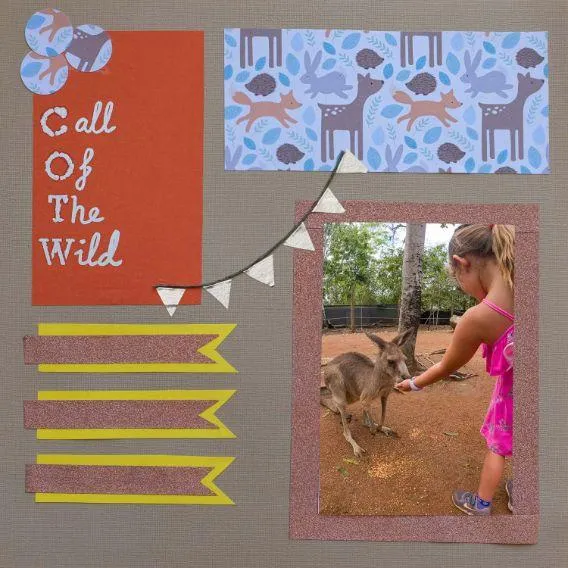
This photograph was taken on a family camping trip to Townsville in Queensland, Australia. We visited an animal sanctuary and spent a great morning feeding and learning about the native animals, including this cute kangaroo who was only too happy to be our friend when she realized we had a bag of grain for her.
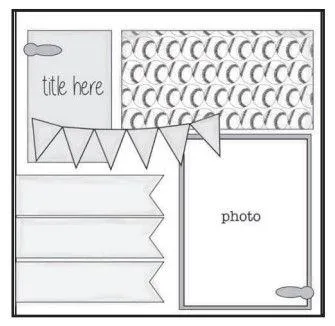
Although I really wanted to use this photograph, I was also really out of ideas and wasted way too much time just staring at my photo and a blank piece of cardstock. I ended up sourcing a layout idea for this project from the book, 525 New & Advanced Scrapbooking Sketches. This layout sketch (shown below) can be found on page 21. The idea for the title was found in the book 10,000 Instant Scrapbook Page Titles in the camping section.
WHAT I USED AND HOW I DID IT
12-inch x 12-inch cardstock base - Tan
Small piece of twine
Silver paint pen
Letter stencils
Washi tape
Craft paper punch - Circle
Glue stick
Scissors
Ruler and pencil
Scraps of plain color and print paper/cardstock
As that I was following a scrapbook layout sketch and knew in advance where the elements were going on the page, I didn't pre-cut every item. Rather, I just created what I needed as I went along.
Beginning with the photograph, I used washi tape to both create a border around it and adhere it to the page. Moving clockwise onto the banners, I changed these up by adding a strip of washi tape on top and shortening them so they didn't reach the edges of the cardstock base. The banners themselves were outlined with a pencil and ruler before cutting and I just eyeballed the cutting when it came to the washi tape.
Next, I cut and adhered the orange piece of cardstock and set to work on the title. I handwrote the title with a silver paint pen, using a letter stencil for the first letter of each word only. This section was completed by cutting some circles with a craft paper punch and adhering them to the top left corner of the orange cardstock.
A cute woodland-themed pattern was chosen for the rectangle piece in the top right of this camping scrapbook layout and the bunting was made from scrap twine and washi tape cut into triangles.
#4 - BY THE CREEK
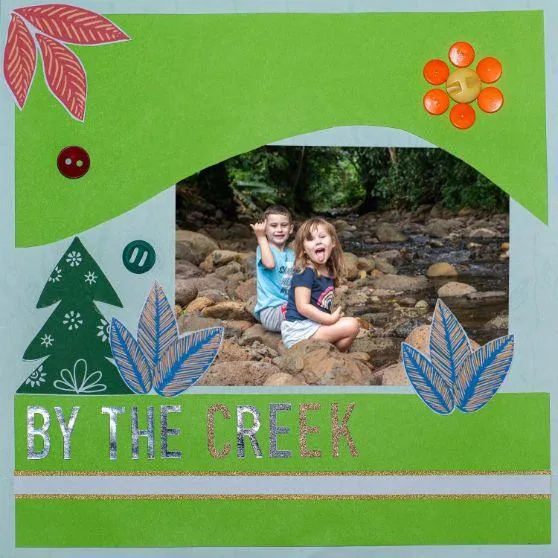
Make your title pop out by using letter stickers
I really wanted to use this photo in a camping scrapbook as it was such a great day and I still cherish this memory two years later. We had headed overseas to French Polynesia and were traveling "van life" style to keep the costs down. On the island of Raiatea, we stayed at a beautiful quiet little property that had a creek right next door that flowered straight from the mountains out to the ocean. The kids and I spent a whole morning just playing in that freshwater creek and it was just a perfect moment.
WHAT I USED AND HOW I DID IT
12-inch x 12-inch cardstock base - Patterned (although you can't see it in the photo)
12-inch x 12-inch cardstock - Green
DIY printables of plants
Washi tape
Letter stickers
Buttons
Glue stick
Liquid glue
Scissors
Ruler and pencil
I started by cutting out my DIY printables and two pieces of green cardstock. One piece for the strip along the bottom, and a second curved strip for the top (as per the photo). I just eyeballed this curvy line, marking it with a pencil and cutting it out.
Next, I stuck my photo in place and then adhered the green pieces, with the top green piece slightly overlapping the photograph. I used letter stickers for the title, "By The Creek" and directly under this, I placed a glittery gold strip of washi tape. The white strip on top of this washi tape strip is actually the backside of some of the green cardstock I used earlier.
Finally, I stuck down my DIY printables and using liquid glue, placed the buttons to finish it off.
#5 - CAMPING BENEATH THE MOON AND STARS
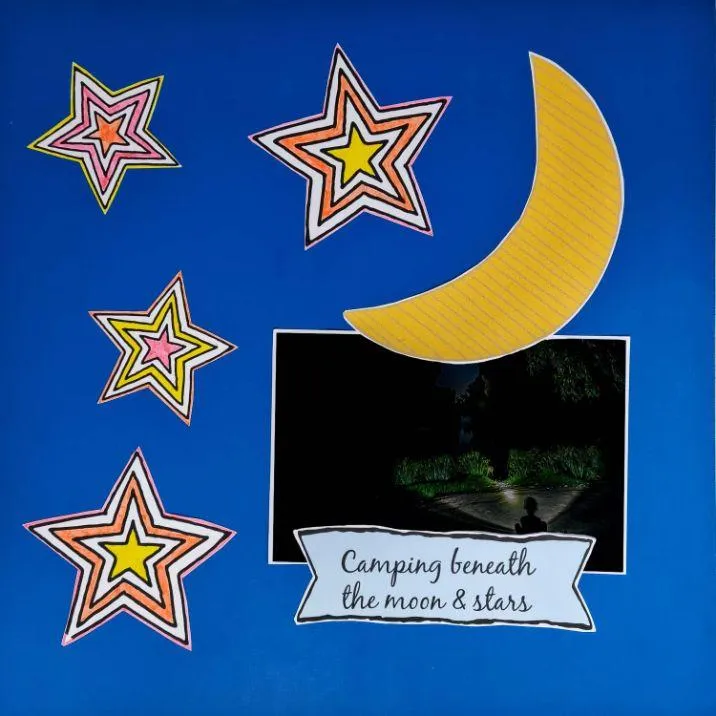
A beautiful camping scrapbook layout using simple scrapbook supplies
I had set this photograph aside a few months ago for a camping scrapbook layout with a nighttime theme. Although it's hard to tell from the re-taking of this photograph, it's a scene showing my son sitting with a torch in front of a waterhole in Central Australia while we watched the stars turn on one by one. We were fortunate enough to camp right next to the creek!
WHAT I USED AND HOW I DID IT
12-inch x 12-inch cardstock base - Dark blue
DIY printables of the moon and stars
DIY printables of the title
Colored markers
Glue stick
Scissors
I had a good idea of how this layout was going to look in my head so I started by sticking down my photograph. Next, I cut out the DIY title (the words were sourced from the book
10,000 Instant Scrapbook Page Titles) and the moon and stars printables.
These were simply stuck down with a glue stick. All in all, this was a pretty quick camping scrapbook idea.
#6 - RV THERE YET?
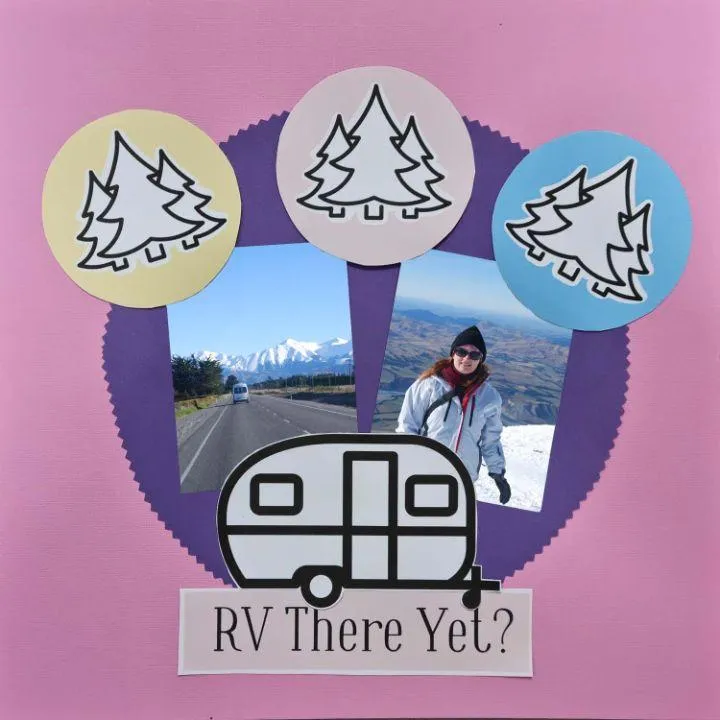
The two photographs used in this camping scrapbook idea were from a campervan trip around the South Island of New Zealand. I was a little stuck on the title but also sourced this one from the book, 10,000 Instant Scrapbook Page Titles. "RV There Yet?" ..... It's funny, right? Do you get it? Those of you with kids or grandkids certainly will!
WHAT I USED AND HOW I DID IT
12-inch x 12-inch cardstock base - Pink
Scrap cardstock - Purple
DIY printables of RV and/or camping images
DIY printable title
Decorative edge scissors
Scissors
Glue stick
I started by creating the large purple circle layer and gluing it in the center of the pink cardstock base. The circle was created by tracing around a small plate and cutting with decorate edge zig-zag scissors.
Next, I cut my DIY printable title and images and played around with them a little on the page with my photograph. When I was happy with the layout, I adhered them with a glue stick.
I don't know about you, but all this talk about camping scrapbook ideas and layouts is making me want to pack up and go camping again. Have you started a camping scrapbook yet? We would love to see your version of one of these ideas.
Happy scrapping!
OUR BEST SELLING BOOKS


HERE'S SOME OTHER SCRAPBOOKING ARTICLES THAT YOU MAY FIND HELPFUL
The Top 5 Scrapbooking Tools That Are Proven To Help You Create Better Layouts
12×12 Scrapbook Layouts Tips You Should Never Miss!
5 Tips To Creating Catchy Scrapbook Titles For Your Layouts
TOP 5 Scrapbooking Ideas I LOVE!
How to Scrapbook: The Ultimate 'Learning How to Scrapbook for Beginners'
Scrapbooking Tips: 10 Tips To Help You Create Even More Enchanting Pages!
5 Simple Scrapbook Organization Ideas and Tips!
Scrapbook Stores Online: Shop from the Top 7 Best Craft Stores
Contact Us | Login | Store | About | Reviews | Privacy Policy | Terms & Conditions | Returns
Copyright © 2025 by ScrapbookingCoach.com
We accept payment with:
