5 Simple Scrapbook Organization Ideas and Tips!
At some point, every scrapbooker feels totally unorganized and will have a hard time coming up with scrapbook organization ideas.
With all the new embellishments, card stock and
scrapbook supplies you buy, it's easy to outgrow your space!
That's why in this guide I'll show you 5 simple steps and ideas to get your mess of scrapbooking supplies organized fast!
1. Scrapbook Organization Ideas On How To Sort Your Scrapbook Paper

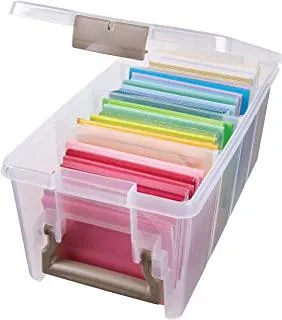
Clear storage box with dividers $10 - $20
This is by far the cheapest option, and it does the job perfectly.
Dividers are an excellent scrapbook paper storage that will sort your cardstock into complimentary colors.
And the fact the storage box is clear makes it easy to pop the lid and grab what you're looking for.
The way the paper sits in the box also ensures it's protected and the lid keeps the dust out!
This is a great option if you have under 250 sheets of card stock.
Craft drawers (varying in price from $20 - $40)
Craft drawers are a great solution for storing paper, however they have one main drawback.
Your way of organizing your paper is limited by the amount of drawers you have.
So if you only have four drawers, then you'd only be able to categorize your paper into four groups.
This isn't a problem if say you were organizing your papers by seasonal colors. But if you wanted to go further and organize by theme, then you might need another solution.
If you're interested in craft drawers, you might also want to look into other scrapbooking organization furniture like craft paper shelves. They look similar but the draws obviously close and protect your card stock from dust. The shelves will leave everything exposed.

Storage paper rack ($30 - $40)
If you find yourself scrapping and crafting a LOT then a paper rack is a good solution.
Your paper is instantly accessible and often a paper rack sits nicely on your desk.
Not to mention the lovely colors all your on display papers give to your room!
However as with the paper shelf, your card stock is exposed to the elements, so watch out when you're using spray inks!

The bottom line is - there's lots of solutions and ideas for organizing your paper, just pick the one that makes sense for you right now.
Tip: save your scrapbook paper scraps and
get these paper scraps sorted by color in a separate container, they are perfect for making adorable mini scrapbook pages.
Wait! Once You Have Your Scrapbook Supplies, Then You'll Need To Know How To Get Organized....Let Me Show You...
♥How to organize all your photos in 7 days or less!
♥How to store your photos safely and protect them from rot and decay...
♥How to always have the perfect pictures to scrap at your fingertips!
2. Organizing your photos & pictures
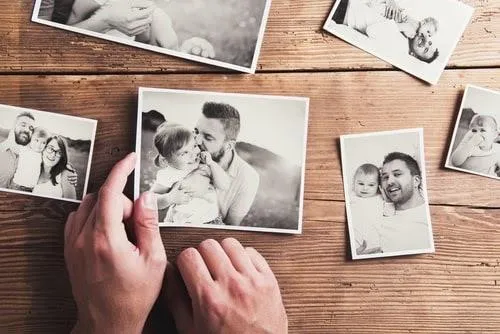
The reason we scrapbook is to preserve the memories behind our precious photos. But what happens when you've got a mountain of photos piling up?
You spend more time looking for your pictures than actually scrapping them!🤣
So here's how we're going to organize your photos...
Organize sequentially
This means, organize in order, so by year.
So oldest photos to most recent is the easiest way to do this.
You could have boxes of photos by year. Or on your computer storage folders on Google drive of all your pictures from a certain year.
In fact, if you take a lot of photos on your cell phone, if you synch it to Google drive, your photos should be automatically time stamped. Which means they'll be organized from oldest to most recent!
Here at Scrapbooking Coach we also have a book that helps you sort, and store all your photos and pictures.
You can find out more about that here.

Synching your pictures to Google drive will organize them automatically
3. Organize your embellishments
We all love fabulous scrapbook supplies such as your gorgeous scrapbook
page embellishments but these tiny scrapbooking supplies are so easy to lose!
This is where zip lock bags come in super handy.
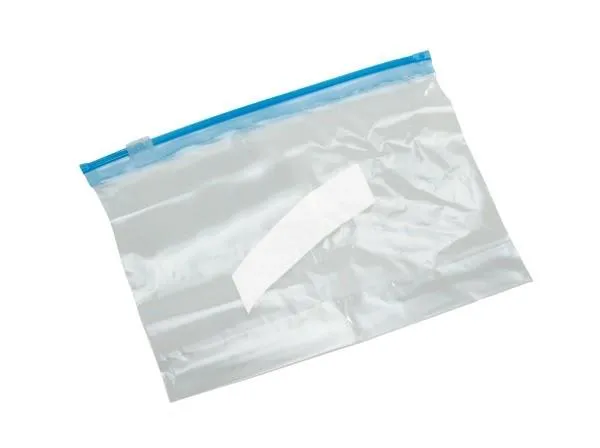
Plastic zip lock bags are cheap and easy to use storage solutions for your scrapbook supplies!
I love this storage solution because:
- They come in LOTS of different sizes
- They can be bought in bulk!
- They are cheap (think $10 for 25 bags!)
Use zip locks as your scrapbook sticker organizer and for other smaller supplies such as card stock scraps, pens, washi tape, and scrapbooking stamps! It's one of the best way to organize and store your embellishments without spending too much!
You can also arrange your scrapbook supplies by project!
So Christmas scrapbooking embellishments can get in one zip lock bag, wedding items in another, family genealogy in another, and so on and so forth.
4. Label everything
There's two types of scrapbookers in this world...
- Labellers
- Non labellers
My advice and one of the most helpfulscrapbooking room ideas ever? Be a labeller.
In other words - if you store something, then label what you're storing.
Some boxes or drawers will hide the contents, so it's important to label what something is storing.
Labeling your supplies also helps in keeping you organized. Because when you buy those new Christmas embellishments, you know to put them in the zip lock bag titled, "Christmas embellishments".
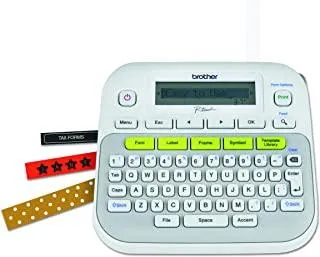
The older style label makers are easy to use and should do the trick.
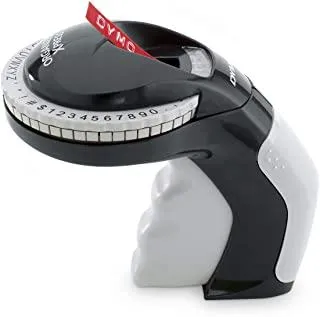
But..... there's some new label makers on the market that print out some pretty cool looking labels. That dare I say it, you could even use on your scrapbook pages!
Check out the cool star strips this one prints out below - anyone else for making their own washi tape?
4. Organize your time
Being unorganized with your time is the reason so many scrappers say they don't have enough time to scrap.
So here's one of my favorite ways to organize my scrapbooking time.
When my husband and I sit down to watch a film, I create my own scrapbooking kits (that I can use later).
So I pick the photos I want to scrap, the paper I want to use and the embellishments and then put them all in a big zip lock bag.
This way - when I go into my craft room to scrap, I have already organized so much, and I can dedicate all my time to coming up with scrapbook ideas!
Remember the one thing that kills creativity is overwhelm. So by creating your own kits at another time, you free yourself up to be more creative when you're ready to scrap!
Final Thoughts
I hope this guide on these scrapbook storage ideas will hopefully free up space in your craft room and help you get organized so you can enjoy scrapbooking without the hassle of a messy scrapbook space!
We all love unleashing our creativity in an environment that makes us feel open and free to do everything we want and need to accomplish, and I hope that these scrapbook organization ideas will help you feel just that!
5 Scrapbook Organization Ideas Video
OUR BEST SELLING BOOKS
HERE'S SOME OTHER SCRAPBOOKING ARTICLES THAT YOU MAY FIND HELPFUL
The Top 5 Scrapbooking Tools That Are Proven To Help You Create Better Layouts
12×12 Scrapbook Layouts Tips You Should Never Miss!
5 Tips To Creating Catchy Scrapbook Titles For Your Layouts
TOP 5 Scrapbooking Ideas I LOVE!
How to Scrapbook: The Ultimate 'Learning How to Scrapbook for Beginners'
Scrapbooking Tips: 10 Tips To Help You Create Even More Enchanting Pages!
5 Simple Scrapbook Organization Ideas and Tips!
Scrapbook Stores Online: Shop from the Top 7 Best Craft Stores
Contact Us | Login | Store | About | Reviews | Privacy Policy | Terms & Conditions | Returns
Copyright © 2023 by ScrapbookingCoach.com
We accept payment with:
